3D printing opens up a universe of possibilities in manufacturing. Even at home, you can create unlimited possibilities with a Geeetech FDM 3D printer.However, the final printed model often has a lot of annoying layers that make the whole work look rough.It is only through some post-processing techniques that a smooth appearance can be achieved.The 3D printer filaments comes in ABS and PLA.PLA is more commonly used , which can’t react with the chemical like ABS.You have to keep sanding to get a smooth surface.Obviously this is hard and time – consuming.
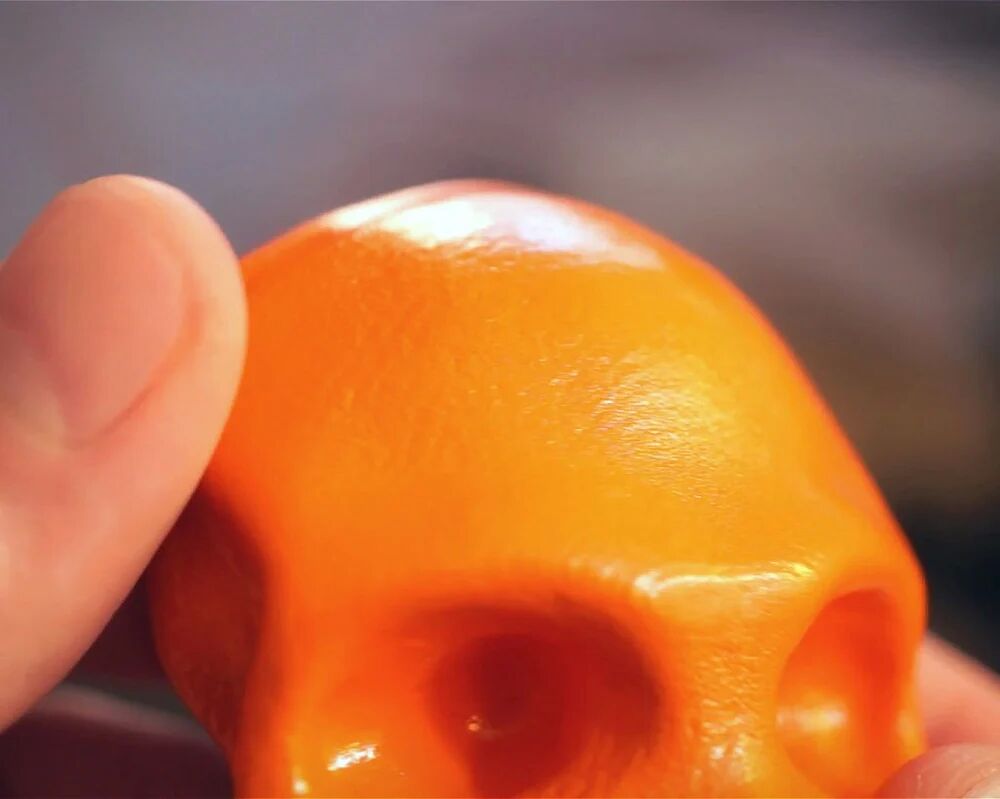
Fortunately, we can refer to 3DSage’s unique method of getting a beautiful look without using sandpaper.He printed a model of the skeleton as a demonstration. All you need is a can of spray paint that combines well with plastic (such as Rust-Oleum) and a bottle of Fast Drying Polyurethane – Clear Satin. Let’s get started!
3DSage shares the Skeleton model that he uses in his own example
The first step is to check whether there is dirt or dust on the 3D printed model and make sure there is nothing superfluous on the surface.Apply a spray paint of your choice to the model, followed by a quick coat of polyurethane.
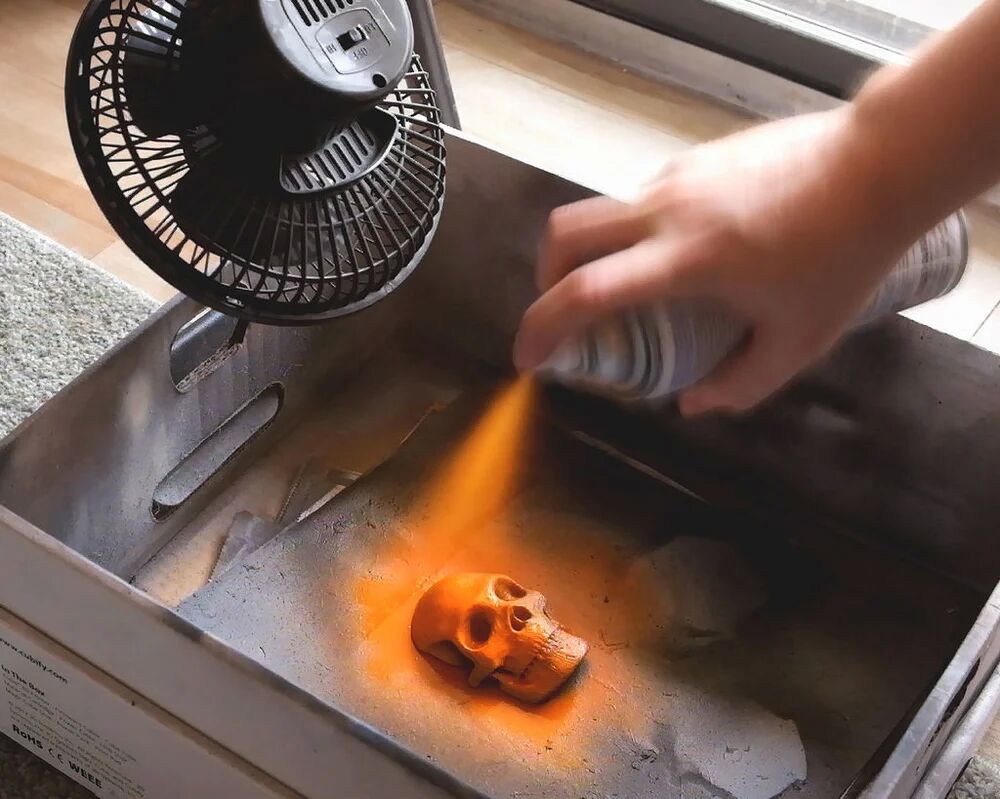
Next, to make the coating dry faster and prevent drips, you should carefully place the model under the fan.At this point you can see that the mixture of paint and polyurethane will blend into the layer, making up for any holes or unexpected imperfections and working best with thin layers and patience.3DSage said he waited for a whole day before adding the final coat of spray paint.And the time interval between layers is 20 minutes in order to prevent discoloration and make up for defects.
Put the coated 3D print under a fan to make it dry faster
When it comes to the benefits of his craft, The Maker says it allows him to print faster with a greater layer thickness.This process will mask any rough and unsightly appearance.And you can choose any color of paint.In this way,you get a smooth print model that doesn’t require polishing or other post-processing techniques.
without a doubt,you can’t bear some minor flaws in the face of a 3d printing model, let alone “String”.You complained that this printer is such a trash Contrary to expectations.At that time,You may get mad but it will eventually ending up in a mess.
So firstly you need to calm down.Take a close look at what the problem is,make it clear that how it happened and how we can solve the problem.Let’s dive in.
What’s the Problem?
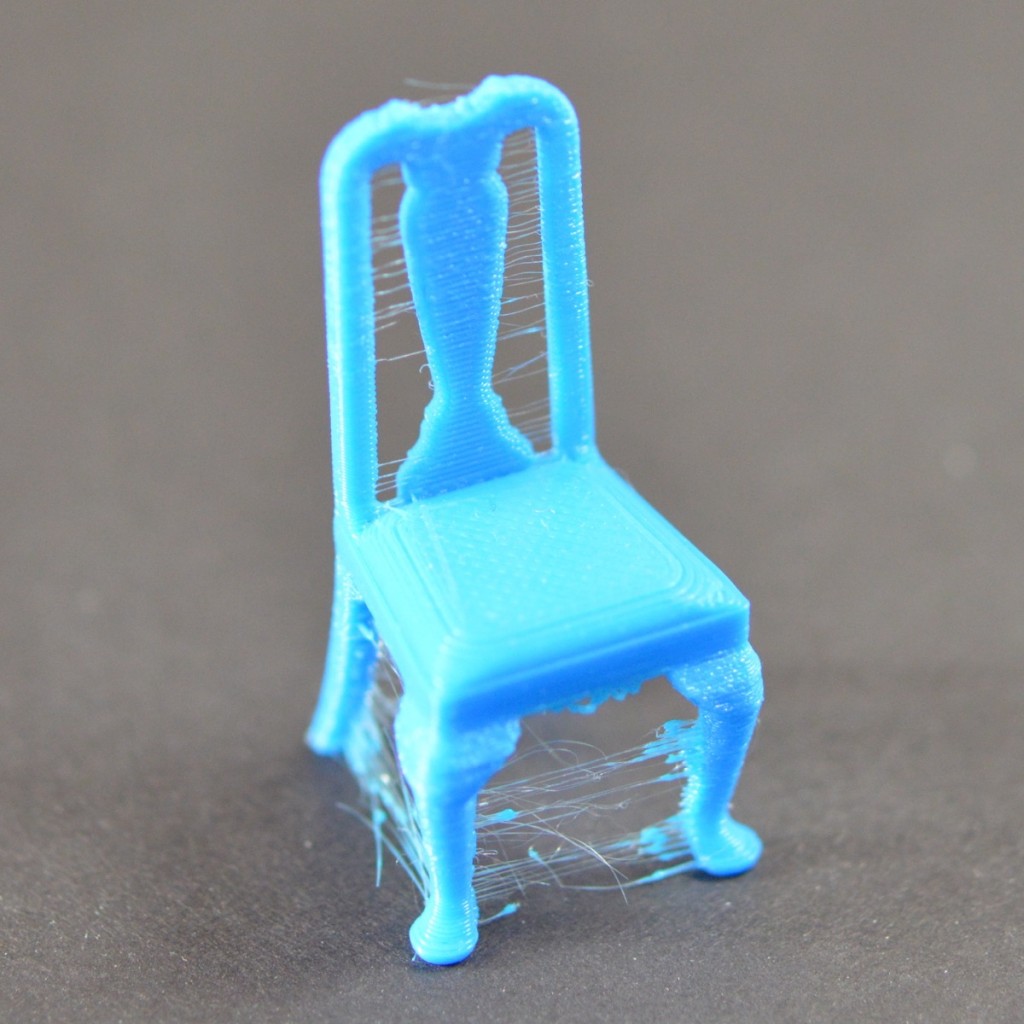
Stringing exists when small strings of plastic are left behind on a 3D printed model. This is usually due to plastic leaking out of the nozzle as the extruder moves to a new position.
Finished print affected by stringing
How to fix this?
In this article, we’re going to look at 5 Solutions that are common to all the major 3D printers.
1.Enable Retraction
Enabling retraction is the most ordinary way used to fight against 3D printer stringing. Enabling retraction means that means that when the extruder has to pass through a gap, the filament is retracted a little bit by the feeder.Once the extruder reaches the next position, the filament is pushed out and the print continues again from the nozzle.If the retraction setting is turned on and you’re still experiencing 3D printer stringing, you may then need to go into the details of the retraction settings:
Retraction distance
The most important retraction setting is the retraction distance. This determines how much plastic is pulled out of the nozzle. Generally speaking, the more plastic that is retracted from the nozzle, the less likely the nozzle is to seep out as it moves. Most direct-drive extruders only require a retraction distance of 0.5-2.0mm. If you run into stringing with your prints, try increasing the retraction distance by 1mm and test again to see if the performance improves.
Retraction speed
The next retraction setting that you should check is the retraction speed. This determines how fast the filament is retracted from the nozzle.If the retraction is too slow,the plastic will slowly leak out of the nozzle and may begin to leak before the extruder moves to its new position. If you retract too quickly, the filament may separate from the hot plastic inside the nozzle, or the rapid movement of the drive gear may even grind away pieces of your filament. There is usually an optimal point of retraction between 1200-6000 mm/min (20-100 mm/s) .
If standard retraction isn’t doing the trick, try reducing the minimum travel. This is usually the quickest solution to fix stringing issues. Drop the value by 0.5mm until the stringing has stopped completely.
2.Set the Right Temperature
The extruder temperature is the next most common cause for stringing.If the temperature is too high, the plastic inside the nozzle will become less sticky and more likely to leak out. Whereas, if the temperature is too low, the plastic will be kind of solid and difficulty in extruding from the nozzle. If you feel you have the right retraction settings, but you’re still having these problems, try decreasing your extruder temperature by 5-10 degrees. This will greatly improve the quality of your printing.
3.Movement Speed
Moreover,increasing the movement speed of your machine can also reduces the time it takes for the extruder to leak as it moves between parts. The X/Y Axis Movement Speed represents the side-to-side travel speed, and is frequently directly related to the amount of time your extruder spends moving over open air.As long as your machine can handle moving at higher speeds, increasing this settings may reduce stringing between parts.
4.Thoroughly Clean the Nozzle Before Printing
When you use a printer for a long time, the filament can leave a thin layer of residue in the nozzle. This thin layer can cause 3D printer stringing as filament strands will try to stick to the surface of your printed part.
To avoid this type of problem, ensure your nozzle is thoroughly cleaned before any printing to remove any dirt from the previous filaments.
5.Keep Your Filaments Moisture-Free
PLA, which absorbs more water than ABS, is the main culprit.The water turns to steam when the plastic is heated up, and it can mix with the plastic to increase the likelihood that it will seep out during non-printing movements.
In FDM 3D printing, sometimes the nozzle may deposit unwanted plastic on the printed part where it is not supposed to while the extruder is traveling to a new point; the plastic then cools and sticks to the object, making it look hairy and unsightly.
Stringing can be a common problem especially when you are a newbie or dealing with a new machine or material. But luckily, it is a problem that is fairly easy to solve. Let’s look at some solutions:
Retraction distance
Retraction distance is themost important retraction setting as it determines how much consumables is pulled back from the nozzle. Generally speaking, the furtheryour nozzle retracts, the less likely oozing is to happen. But if the distance is set too high, the plastic may not be able to to reach the hot end and may cause under extrusion. In general, Bowden extruders require a higher retraction distance than direct drive extruders.The optimal value falls in somewhere between 4-7mm(most likely to be 6mm) for most Bowden extruders and 0.5-2.0mm for most direct drive extruders. Some trial and error is probably going to be required to get the retraction distance right.
Retraction speed.
Retraction speed determines how fast the material is retracted from the nozzle. Generally, a quicker retraction will reduce the chances of leaking. But again, it could also be problematic: first, it may cause the plastic to separate from the melted filament inside the nozzle; second, the fast movement of the drive gear could grind parts of your filament away. A sweet spot is usually found somewhere between 25-40mm/s. Again, you will need to experiment to get the optimal value.
Temperature
If stringing persists after you have tweaked around the retraction settings, go on to check the extruder temperature. As the temperature goes up, the plastic inside the nozzle becomes more liquefied and less viscous, and therefor, more likely to drip out of the nozzle. On the other hand, if the temperature is too low, the filament may not be properly heated and melted,creating problems with extrudion. To fix excessive stringing and avoid issues with extrusion, start out by lowering the temperature by 5-10 degrees to see if the print quality improves.
Travel distance and speed
Another possible solution to stringing is to reduce the distance between points/locations the extruder travels. As we already know, stringing occurs while the extruder is moving to the next point. Therefore, the reduced travel distance will slash the chances of leaking. By the same token, increasing the movement speed of the extruder can also prevent stringing from happening.
Maintenance
To avoid stringing, you are also suggested to do the following :
1, clean your nozzle
2,keep your filament clean and dry
Remember: performing a routine maintenance on your 3D printer always helps with your print quality.
Warpingis when one or more corners/edges at the bottom of the object are lifted and detached from the printing platform horizontally,leading to transverse cracks in the top.
Cause(s): Warping is a common problem and often occurs when the first layer of plastic contracts as it cools.
Solution(s):
Level the printing platform. A tilted printer bed could result in warping. Most budget 3D printers require manual leveling, which is not a one-time thing as you may be wondering: multiple leveling might be required for the first print and between prints.
Use a heated printer bed. If your printer does not come with a heated bed(which is rare except for DIY kits ), like the Geeetech E180(this printer is specifically designed for educational purposes.It works with PLA. As such, an alternative to a heated bed,such as textured paper,is used to improve adhesion ), you can either get one yourself ,or apply glue to keep the first layer of the object stuck to the platform. After leveling the platform, make sure the nozzle height is correct.
P.S.: there are 2 types of heated beds on Geeetech 3D printers :MK2A/MK2B and aluminum substrates.
Slow down your print job. Warping could occur when the nozzle moves too fast, this is because the layers, especially the innitial layers are not given enough time to cool. It is suggested that users reduce the speed by 50% when printing the first layer to allow for better adhesion of the extruded material to the platform.
Create some extra parts that can be easily removed in the model design to prevent the base layer from rising from the edges.provided you are proficient in modeling software.
Placing a build surface onto the printer bed can also effectively reduce the chances of warping. Though removing the object off the plate could entail some extra work,if it is a substantial one.
Check the temperature parameters are set correctly. The extruded filament would not stay flat on the platform if the temperature of the printer bed is too low. The recommended range for PLA is 40 to 50 degrees celcius, ABS 60 to 70 degrees.
Should you have more questions regarding 3D printers or 3D printing in general, you can always visit our official forum or join our facebook user group where you will get your quesitons answered by 3D printing hobyyists /experts or geeetech staff.
Geeetech is one of the leading brands in 3D printers for home and office use.To find out more, go to https://www.geeetech.com/.
In the process of 3D prining, consistent supply of consumables must be ensured at all times. In case your filament stops feeding,you can try to troubleshoot by doing the following:
(1) Look into the extruder. If the extruder itself is out of order, it will not be able to send consumables. There are a couple of reasons why it is not working properly. For instance, the crews for the clamping device are not tightened;the bearing of the feeding shaft rod is loose; the knurling of the shaft rod is not facing the filament, etc.
(2) Check whether the filament is pressing against the inside edge of the white head
cover. In this case, a simple push will do the trick. Note that piled up materials could also stifle the feeding process.
(3) Check whether the filament has slipped. If the filament does not melt in time ,or gets stuck in a certain position and cannot go into the heating block, the feeder may rub it into a pit,causing the filament to slip.
(4) See if the set temperature is appropriate.Temperatures should be set according to
the type of material being used.Generally, ABS works best at about 250 degrees, while
PLA 220 degrees. Other materials have different temperature requirements.