显示标签为“guide”的博文。显示所有博文

2020年10月8日星期四

5 Easy Ways to Prevent 3D Print Stringing

without a doubt,you can’t bear some minor flaws in the face of a 3d printing model, let alone “String”.You complained that this printer is such a trash Contrary to expectations.At that time,You may get mad but it will eventually ending up in a mess. 

So firstly you need to calm down.Take a close look at what the problem is,make it clear that how it happened and how we can solve the problem.Let’s dive in.

What’s the Problem?

Stringing exists when small strings of plastic are left behind on a 3D printed model. This is usually due to plastic leaking out of the nozzle as the extruder moves to a new position.
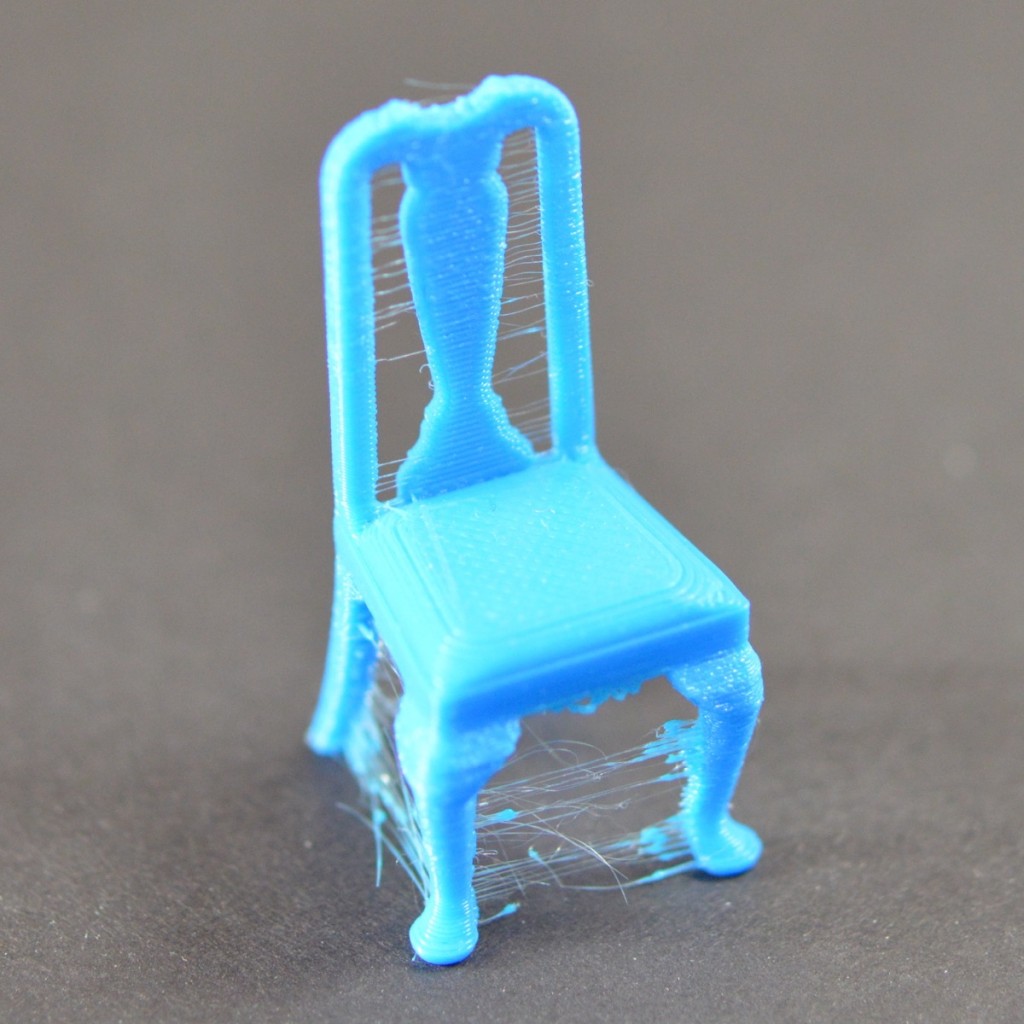
Finished print affected by stringing

How to fix this

In this article, we’re going to look at 5 Solutions that are common to all the major 3D printers.

1.Enable Retraction

Enabling retraction is the most ordinary way used to fight against 3D printer stringing. Enabling retraction means that means that when the extruder has to pass through a gap, the filament is retracted a little bit by the feeder.Once the extruder reaches the next position, the filament is pushed out and the print continues again from the nozzle.If the retraction setting is turned on and you’re still experiencing 3D printer stringing, you may then need to go into the details of the retraction settings:

  • Retraction distance

The most important retraction setting is the retraction distance. This determines how much plastic is pulled out of the nozzle. Generally speaking, the more plastic that is retracted from the nozzle, the less likely the nozzle is to seep out as it moves. Most direct-drive extruders only require a retraction distance of 0.5-2.0mm. If you run into stringing with your prints, try increasing the retraction distance by 1mm and test again to see if the performance improves.

  • Retraction speed

The next retraction setting that you should check is the retraction speed. This determines how fast the filament is retracted from the nozzle.If the retraction is too slow,the plastic will slowly leak out of the nozzle and may begin to leak before the extruder moves to its new position. If you retract too quickly, the filament may separate from the hot plastic inside the nozzle, or the rapid movement of the drive gear may even grind away pieces of your filament. There is usually an optimal point of retraction between 1200-6000 mm/min (20-100 mm/s) .

If standard retraction isn’t doing the trick, try reducing the minimum travel. This is usually the quickest solution to fix stringing issues. Drop the value by 0.5mm until the stringing has stopped completely.

2.Set the Right Temperature

The extruder temperature is the next most common cause for stringing.If the temperature is too high, the plastic inside the nozzle will become less sticky and more likely to leak out. Whereas, if the temperature is too low, the plastic will be kind of solid and difficulty in extruding from the nozzle. If you feel you have the right retraction settings, but you’re still having these problems, try decreasing your extruder temperature by 5-10 degrees. This will greatly improve the quality of your printing.

3.Movement Speed

Moreover,increasing the movement speed of your machine can also reduces the time it takes for the extruder to leak as it moves between parts. The X/Y Axis Movement Speed represents the side-to-side travel speed, and is frequently directly related to the amount of time your extruder spends moving over open air.As long as your machine can handle moving at higher speeds, increasing this settings may reduce stringing between parts.

4.Thoroughly Clean the Nozzle Before Printing

When you use a printer for a long time, the filament can leave a thin layer of residue in the nozzle. This thin layer can cause 3D printer stringing as filament strands will try to stick to the surface of your printed part.

To avoid this type of problem, ensure your nozzle is thoroughly cleaned before any printing to remove any dirt from the previous filaments.

5.Keep Your Filaments Moisture-Free

PLA, which absorbs more water than ABS, is the main culprit.The water turns to steam when the plastic is heated up, and it can mix with the plastic to increase the likelihood that it will seep out during non-printing movements.

Therefore, it is very important to store the filament properly, especially if you live in a humid environment.For more guidance, check out the previous blog here:https://www.geeetech.com/blog/2020/09/3d-printer-filament-storage-how-is-it-done-properly/

Source:

https://www.simplify3d.com/support/print-quality-troubleshooting/stringing-or-oozing/

https://all3dp.com/2/3d-print-stringing-easy-ways-to-prevent-it/

https://technologyoutlet.co.uk/blogs/news/the-most-common-3d-printing-problems-with-solutions

2020年9月24日星期四

3D Printer Filament Storage – How Is It Done Properly?

 If you have moisture and mold in your home, you’re more likely to have respiratory problems, allergies and weak immune system.When you know the cause of the moisture, you can take steps to limit the moisture in the air.

Likewise, humidity is a natural enemy of filaments.Some materials have no humidity problem.Others, such as PVA or nylon, are very hygroscopic and absorb water after a very short time.The wet filament sizzles and is easy to recognize during printing, and the results are terrible.

Therefore, it is particularly important to store filaments spools carefully and correctly.

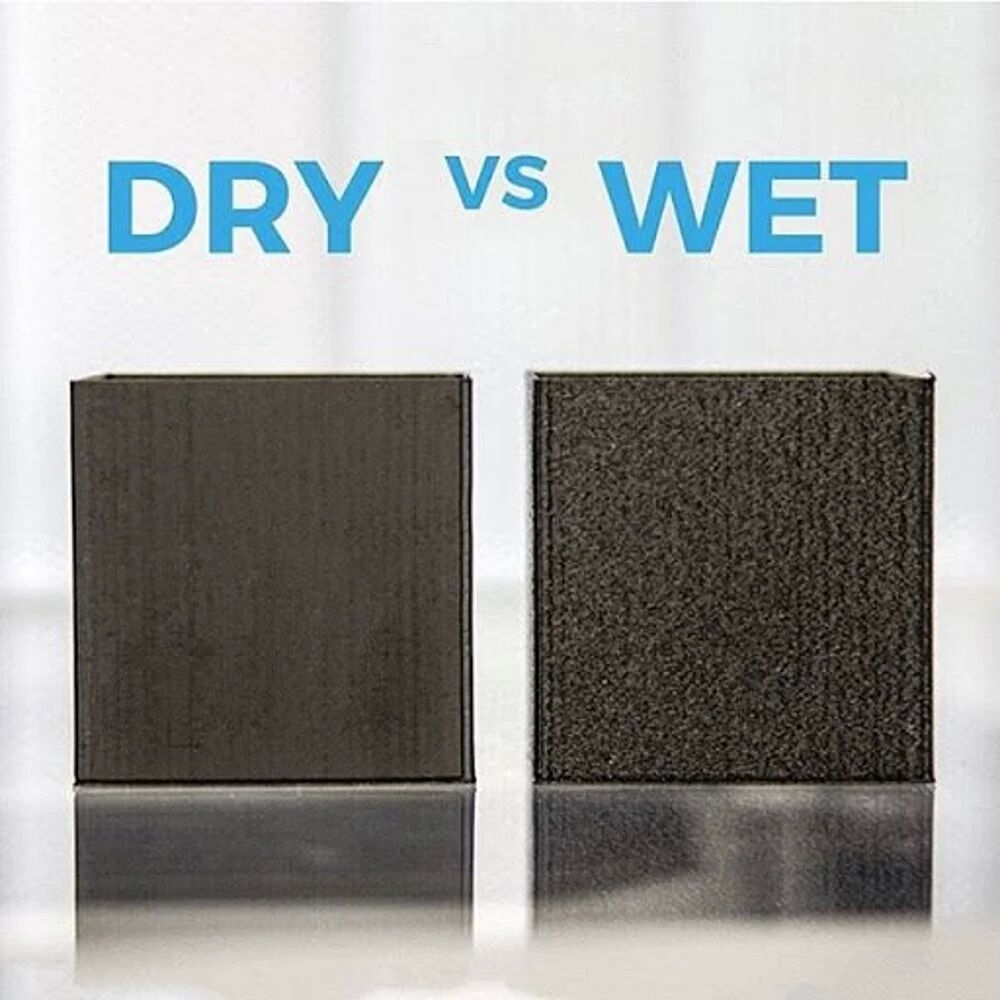
A comparison of dry vs wet filament. Source: Matterhackers

Why Water Damages Thermoplastics

All plastics are polymers or copolymers. you’ll see that the long molecular strands that make up them are woven together when you look at polymers or copolymers under a high-intensity microscope,That means there’s plenty of space between and around the strands.Thererfore, most polymers and copolymers are hygroscopic.Some filament materials, such as Nylon, are very sensitive to water .If  they absorb only a little water, they can cause problems when printing.

How To Keep Your 3D Printer Filament Dry

Storing your filament in an airtight container with a desiccant is the easiest way to settle this issue.Filament dry boxes work well, but they can be bulky.

when it comes to airtight,most people think of plastic containers and bags.For the most part, these are good short-term solutions.

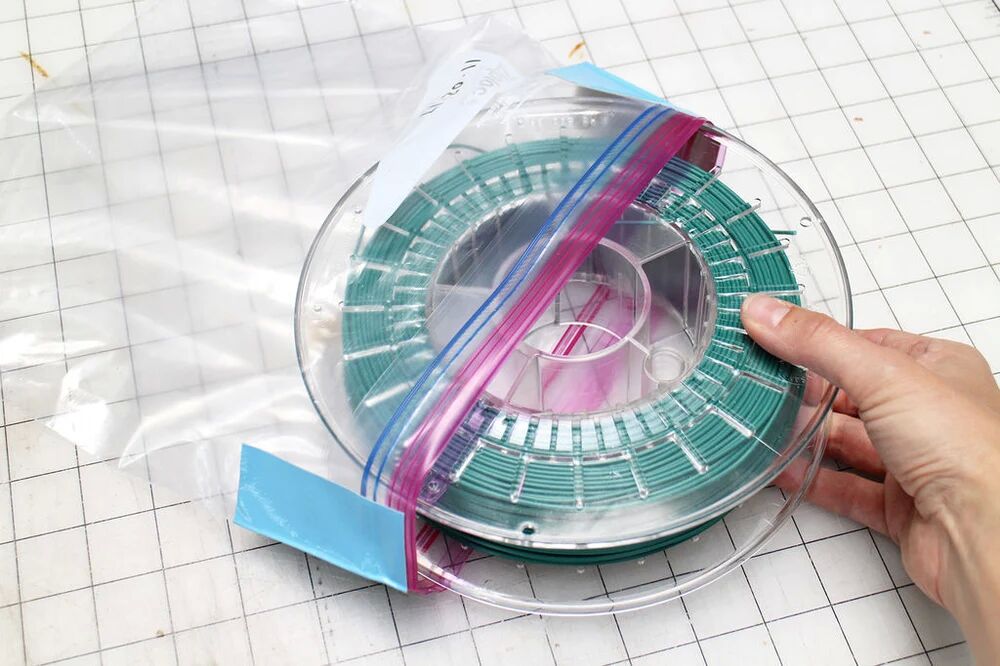
This is the cheapest way to store filament spools. Source: Paige Russell / Instructables

Nevertheless, over time, plastic containers and bags become slightly permeable.This means that the longer your printing materials stay in plastic bags, the more water they absorb, .especially when you live in a humid climate. .If you use a clear bag or box, UV light will also reduce the strength of the filament over time.

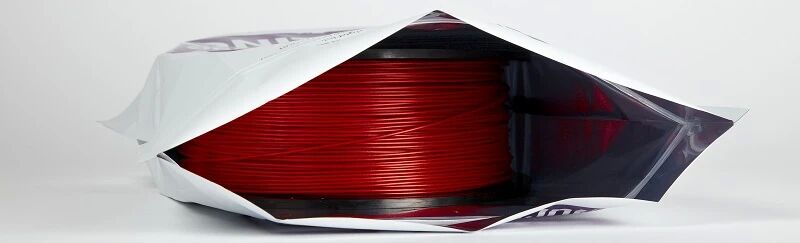
Using high-quality Mylar bags or bags made of similar materials is a better solution is to store your thermoplastic.Obviously, there is a layer of metal between two layers of plastic.

This metal layer protects your printing material from any water vapor that permeates the plastic.So that your printing material produces a satisfactory result.

Mylar bags protect your printing material from water vapor.Source: rigid.ink
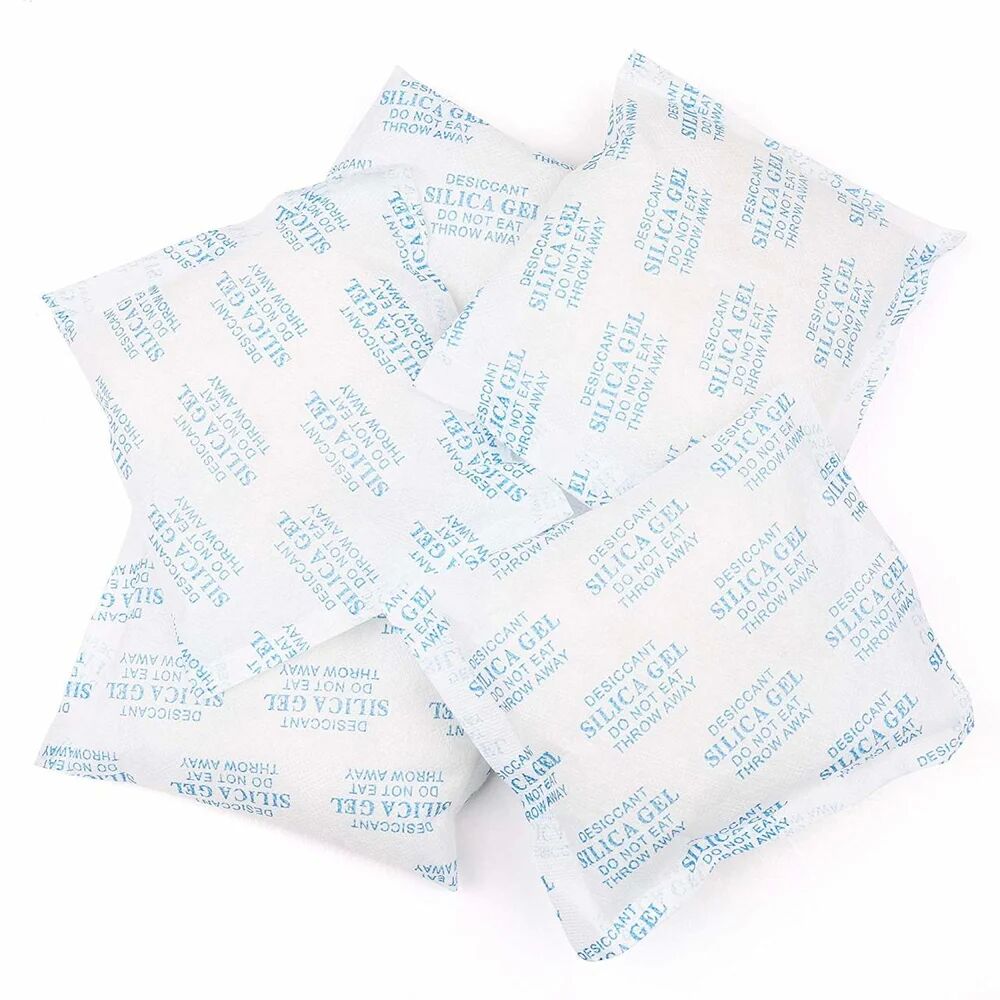
Desiccant packets keep the humidity in the containers to a minimum. Source: Amazon

How You Know Your Printing Material Has Absorbed Water

Before printing, there are two simple ways to determine if your material is absorbing water.First, you can measure the diameter of the material itself.when a polymer absorbs water, it begins to grow in size.If the diameter of the filament increases by 10 percent or more, it most likely absorbs water.

Another way to determine whether a filament absorbs water is to extrude a small amount of filament before printing.We’ve all probably been there: sitting by a fire, listening to its crackle.This is because the water in the wood is changed into steam when heated.The same phenomenon occurs when you extrude thermoplastic that has absorbed water.The heat from the print end causes the water in the plastic to expand and escape.You can hear hissing or popping and also see bubbles.

How to Dry Out Filament

If your filament is wet, you must dry it out before using it to print.Why not use an oven?

Once the oven it up to temperature, place the spooled material inside.Source: Amazon

In the first place, check out the glass transition temperature for the filament that you are going to dry.You need to be sure that you keep your oven temperature below the transition temperature. In a general way , about 60-70C is just about right for most materials, except may be a bit hot for lower temp materials like PLA. Always keep in mind how hot your oven runs and only use electric ovens.

You should also be aware, even if the Glass Transition temp is very high, for a material like Nylon or Polycarbonate – the spool your filament is wound on is likely made from an ABS which will soften at lower temperatures than the filament. 

How to dry PLA filament

You ought to be more careful when you dry PLA filament on account that 70C will be too hot. We recommend at the very lowest temp your oven will go around 40C. Even at this temp your PLA will soften, so drying PLA in the oven won’t always give you the results you’re after. It’s a small reminder as to the importance of keeping excellent PLA storage. 

Once the oven it up to temperature, place the spooled material inside and leave it there for four to six hours. If you have a convection oven, this drying time may be shortened since the circulated air removes more moisture from the material more quickly.You can also ‘recharge’ the desiccant this way too, placing it in the oven over a low heat. 

Once the time is up, remove the material from the oven, allow it to cool and place it into a water impermeable container or bag along with desiccants. Make sure that the container or bag is completely sealed.

Any material that you have oven-dried is slightly more brittle than normal.Remember,Handle the material with care.Only then can you achieve the superior results with your properly dry print material.

Source:

https://all3dp.com/2/filament-spool-8-ways-to-safely-store-your-filament/

https://rigid.ink/blogs/news/how-to-dry-your-filament?_pos=30&_sid=f8cdf3be6&_ss=r

2020年8月5日星期三

Step-by-step guide to dual extrusion setups

Nowadays, desktop 3D printers that come with 2 extruders are more powerful and affordable. Still, many, especially beginners are intimidated by those dual extrusion systems. In light of this, i am presenting to you this step-by-step guide to dual extruder 3D printers in the hopes that you will be able to operate one yourself in the end.


Before reading this article,please make sure you have already read the set up guide of the version of 13B single extruder and you are able use it to print 3D models. If not, please learn how to operate the single extruder. Of course, you can take this one as the single extruder version to get started.

Step 1

Open Repetier Host,click Config/Printer Settings to set up the connection.

1. Name your printer.

2. Select the corresponding COM port and baud rate. Baud rate is generally 115200 or250000.

3. If you are not sure about the COM port, you can check it in your device menager.

Printing setting1.jpg

Step 2

Set up your extruder

1.Choose the number of extruder, here we choose 2.

2.Select the diameter and color of filament

3.Offset X/Y refers to the distance between the two extruders,which can be adjusted based on real situations. You can leave it alone now.

Printing setting2.png

Step 3

Set up the shape of printer

Choose Classic printer as the printer type.

Home X: min Home Y: min Home Z: min

Print height: 150

Printer setting3.png

Now,you can click the Connection button on the left corner to check whether it can connect with your printer. If it fails, please recheck the COM port and Baud rate.

Step 4

Manual control

Printer setting4.png

1. X home

Click X home to home the X axis, or you can click the right/left arrow to move the axis to check whether the direction and distance is correct or not;

2. Check Y axis and Z axis respectively in the same way

3. Click the icon of heated bed on RH to heat up the bed. observe whether the temperature is rising to a pre-set value

4. Click the icon of heated bed and extruder, observe whether it is heating up to the pre-set temperature and keeps at that value

5. When the temperature for the extruder surpasses 170 °C , choose extruder1 and extruder2 respectively, you can move them and check their directions

Step 5

Leveling the two extruders.

Leveling the two extruder is very important if you want to print with two extruders at the same time.

First, you can adjust one extruder to make it parallel with the surface of the heated bed (the same way you level for a single extruder setup) , click the button of Z home to adjust the distance between the nozzle and the heated bed, make sure the vertical distances of the nozzle to the four corners of the bed are the same.

After that, tweak the distance between the second extruder and the heated bed by adjusting the screws, as shown in the following picture: Loose the screws, and then you can move on to get the right distance between two extruders and heated bed.

Printer setting5.png
Printer setting6.png

you may need to repeat this step to get it all right.

But it’s worth it. Once you get it done correctly, you wouldn’t need to do it again.

The settings mentioned above are on Repetier Host,which only involves the control of 3D printer and the preview of model.

All the settings do not concern the print result but slicing. So we will continue with the slicing setting. The slicer is independent of Repetier Host. So,should we set up the slicer now? Take it easy. Let’s see whether our printer can run normally.

Step 6

If the printer goes well. We can go on with the slicing. First let’s get a quick view of the slicer.

RepetierHost supports many slicers, with Slic3r and CuraEngine being the most popular; Slic3r is more powerful in terms of functionality, but CuraEngine comes with more optimized slice velocity.

Printer setting7.png

You can choose slicer here. Upon selecting the slicer, please click Configuration.RepetierHost will bring up a wizard of the corresponding slicer that will walk you through the configuration.

Here we take Slic3r as a demonstration. As to the configuration in CuraEngine,we will pick it up in the follow-up study in our forum www.geeetech.com/forum/, so, please stay tuned. If you are experienced in CuraEngine, we would appreciate it if you cou.ld share your insights with us.

Next, download the file:two_color_cube.zip, unzip the file and save it somewhere.You will need it later.


Step 7

Click Configuration,open Slic3r

Printer setting8.png

Step 8

We have prepared a set of parameters for I3B_2E dual extruder, that is, I3B_2E_config_bundle.ini. You will need import those parameters to slic3r from here.

In Slic3r, under file> Load Config Bundle.. navigate to the folder we just downloaded and unziped, open I3B_2E_config_bundle.ini,

Printing setting9.png
Printing setting10.png
Printing setting11.png

Step 9

After loading, you can find the option of Geeetech_I3B_2E in the drop-down menu.

Printing setting12.png
Printing setting13.png
Printing setting14.png

In my case, i use the geeetech pro C model,(i refer the I3B_2E in this article),extruder is MK8(1.75cm-0.4mm),PLA filament, so we choose Geee_I3B_2E, PLA 1.75mm, and Geeetech_I3B_2E respectively .

All the parameters you set can be saved in RepetierHost for future reference.

Printing setting15.png

Step 10

Unzip two_color_cube.zip,click Load to import the .stl files,choose two_color_cube_1.stl and two_color_cube_2.stl respectively.

Printing setting16.png

Actually, two_color_cube is composed of two .stl files. each printed by one nozzle.

After loading, you can preview it. The two files are separated.Now you need to adjust the locations to combine them together.

Printing setting17.png

Select Object Group 2 and click center, then Object Group 1 and center. Now the two models are combined as one.

Printer setting18.png
Printing setting19.png

Assign printing task for both extruders respectively.

Printing setting18.png

Step 11: Slice

Printing setting21.png
If this warning pops up, choose NO
Printing setting22.png

G-code is generated successfully

Printing setting23.png

Step 12: you can print directly via serial port (USB connector)or save the G-code to SD card, and print stand-alone.

Step 13′: The end

Printing setting24.png
Printing setting25.png

This post is originally published on the Geeetech wiki page and is edited in this blog.

Please be noted this article was last modified on 11 August 2015, and hence is subject to changes, due to software and hardware updates over the years.

If you already have a dual extrusion system, we would like to hear from you. Share you story/experience with us by joinning our forum or Facebook user club. You are also welcome to write on our blog to reach a larger audience.

2020年7月20日星期一

5 Ways to Cash in On 3D printing

Are you a novice in 3D printing, admonished by your parents or mocked by your friends for splashing money on such an expensive “useless” machine?

Are you a seasoned player in 3D printing, wondering what you can do with all your 3D designs, models and 3D printer, aside from keeping them as a hobby ?   

If either of the above scenarios apply to you, you are not alone. Alex, China born and bred, now 27, working and living in Europe, first got into 3D printing when attending university in France. He says one summer afternoon in his sophomore year he ,together with his other three classmates was invited to a small gathering at a local student’s house. At some point his friend showed the guests his 3D printer and started to print a Japanese cartoon character on it. Alex was amazed at how capable this little(well, not exactly little, but Alex thinks so ) machine is.

A few days later, Alex decided to get one himself. So he went online in search of the same 3D printer model his friend was using. As it turns out, the same machine being sold online is priced at $399,not a small expenditure given that he was a student studying overseas and his middle-class family background. He somehow summoned up the courage to ask his parents to buy if for him. According to Alex, his parents were mad at him at first. They wouldn’t get it why he would want to buy such a “useless” but expensive thing. And they were worried that their only son would abandon his study as a result of “playing too much with the machine”.

Long story short, in the end, Alex was able to convince his Dad to buy the printer for him by promising to focus on his study and to return home with a degree,which he did. Fast forward to 1.5 years ago, Alex purchased his first geeetech 3D printer–A20M, and has become a fan of geeetech ever since.

To date, a great number of people still have not heard of desktop 3D printers,just like Alex and his parents years ago, and 3D printing is more of a industrial concept than an everyday conversation topic.

It is projected that 3D printing will be the next big thing in the years to come,with 3D printers for home and office use being more affordable and capable.A similar pattern can be drawn in the developments of smart phones and 3D printers. Smart phones in the early days were expensive,not so “smart”, and known to few.However,a decade later almost everyone owns smart phone. So now is probably the best time to monetize your 3D printing skills and expertise before 3D printers become ubiquitous.

Here are 5 ways to make money with your 3D printer and 3D printing know-how.


Read more...


2020年7月6日星期一

Tips on Dealing with Warping

Warping is when one or more corners/edges at the bottom of the object are lifted and detached from the printing platform horizontally,leading to transverse cracks in the top.

Cause(s): Warping is a common problem and often occurs when the first layer of plastic contracts as it cools.

Solution(s): 

  • Level the printing platform. A tilted printer bed could result in warping. Most budget 3D printers require manual leveling, which is not a one-time thing as you may be wondering: multiple leveling might be required for the first print and between prints.

  • Use a heated printer bed. If your printer does not come with a heated bed(which is rare except for DIY kits ), like the Geeetech E180(this printer is specifically designed for educational purposes.It works with PLA. As such, an alternative to a heated bed,such as textured paper,is used to improve adhesion ), you can either get one yourself ,or apply glue to keep the first layer of the object stuck to the platform.  After leveling the platform, make sure the nozzle height is correct.  
P.S.: there are 2 types of heated beds on Geeetech 3D printers :MK2A/MK2B and aluminum substrates.  


  • Slow down your print job.  Warping could occur when the nozzle moves too fast, this is because the layers, especially the innitial layers are not given enough time to cool. It is suggested that users reduce the speed by 50% when printing the first layer to allow for better adhesion of the extruded material to the platform. 

  • Create some extra parts that can be easily removed in the model design to prevent the base layer from rising from the edges.provided you are proficient in modeling software.  

  • Placing a build surface onto the printer bed can also effectively reduce the chances of warping. Though removing the object off the plate could entail some extra work,if it is a substantial one.

  • Check the temperature parameters are set correctly. The extruded filament would not stay flat on the platform if the temperature of the printer bed is too low. The recommended range for PLA is 40 to 50 degrees celcius, ABS 60 to 70 degrees.


Should you have more questions regarding 3D printers or 3D printing in general, you can always visit our official forum or join our facebook user group where you will get your quesitons answered by 3D printing hobyyists /experts or geeetech staff.
Geeetech is one of the leading brands in 3D printers for home and office use.To find out more, go to https://www.geeetech.com/


2020年6月30日星期二

Guide To Buying Your First 3D Printer

3D printing has been gaining momentum as they become more powerful and affordable, which has aroused interest in them from makers, DIY enthusiasts and many others. Navigating the waters of 3D printing and buying the right 3D printer,however, remain tricky, for the market is teeming with 3D printer brands and models. In light of that, the following 4 factors is listed for you to consider prior to your purchase.


1, Print Technology. 3D printing sometimes is referred to as additive manufacturing. The term print technology basically means how an object is created with what kind of material(s). currently,the most common 3D print technologies are FDM,SLA, and DLP. Each has its own advantages and disadvantages. As a novice, it is important you have a basic idea of the technology your printer use because it would help your rule out many 3D printers that do not suit your purpose.


2, The Almighty WHY. Why are you considering buying a 3D printer?  Knowing what a 3D printer can do, you now should ask yourself what you want to do with it. Are you a maker who want to do prototyping on your own? Are you a newbie trying to get the hang of 3D printing ? There are many printers that are specifically designed to meet different needs and their prices vary greatly.Having a clear purpose can help you further narrow down your options.  


3, Know Yourself. Are you technologically-savvy and willing to spare time and effort to learn how to operate a 3D printer? Most budget 3D printer require manual bed leveling and assembly, which is tedious and time-consuming. If you are not good with assembly, calibration, or find yourself under tight schedules, you may want to raise your budget for a more advanced one that is ready to use, and features auto-leveling. Some brands offer machines that can be operated with a remote control and/or a touch screen. But you would have to pay extra for these things.


4, Print Quality. Now, there are many things of a 3D printer that determines the print quality. And that requires a deeper study into the specifications of the 3D printer. Here i will only touches on the extrusion system. Some brands now offer dual or triple extruder 3D printers that enable users to mix materials and colors to create colorful,vivid objects,where single extruder 3D printers fall short of.  

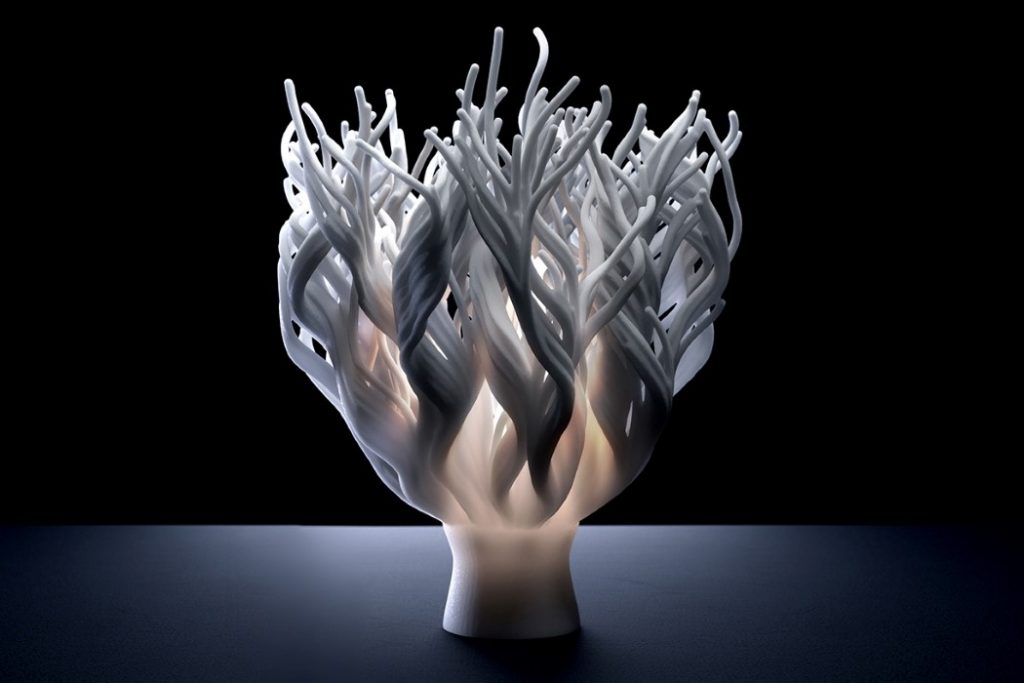
Watch These Bionic 3D -Printed Coral Lamps

  It’s one thing to create attractive and functional light fixture, and quite another thing to make a stunning light using algorithms that c...