It’s one thing to create attractive and functional light fixture, and quite another thing to make a stunning light using algorithms that copy coral growth patterns.
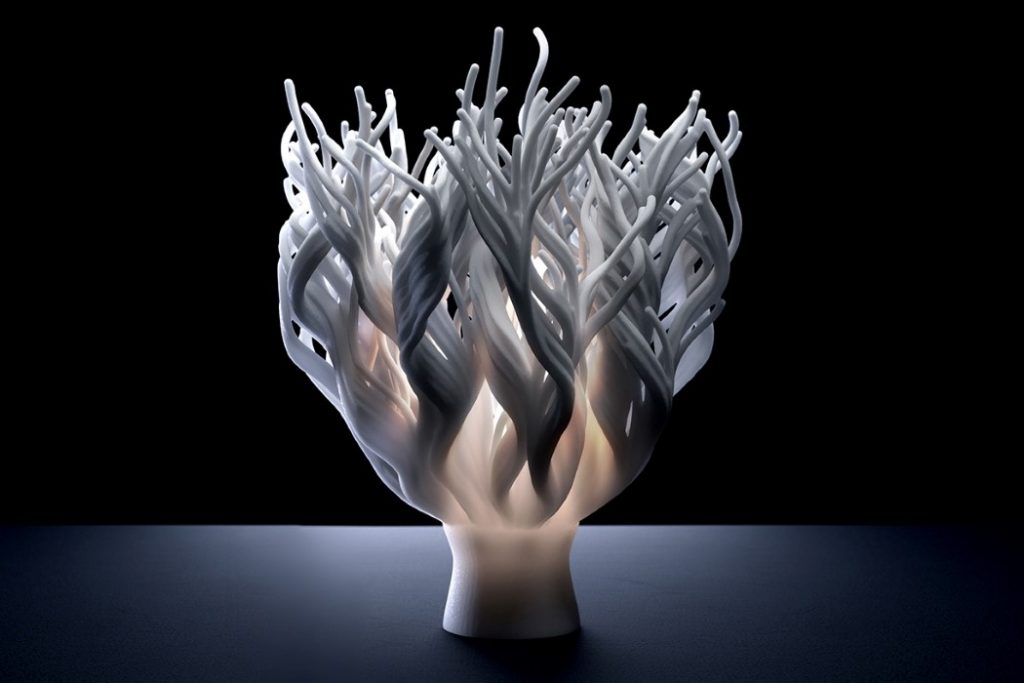
The 3d-printed Sargasso lamp
Industrial designer John Mauriello,based in San Francisco,broke the conventional thinking and put the effort into his Coral Lamp Lighting Collection with something else entirely.
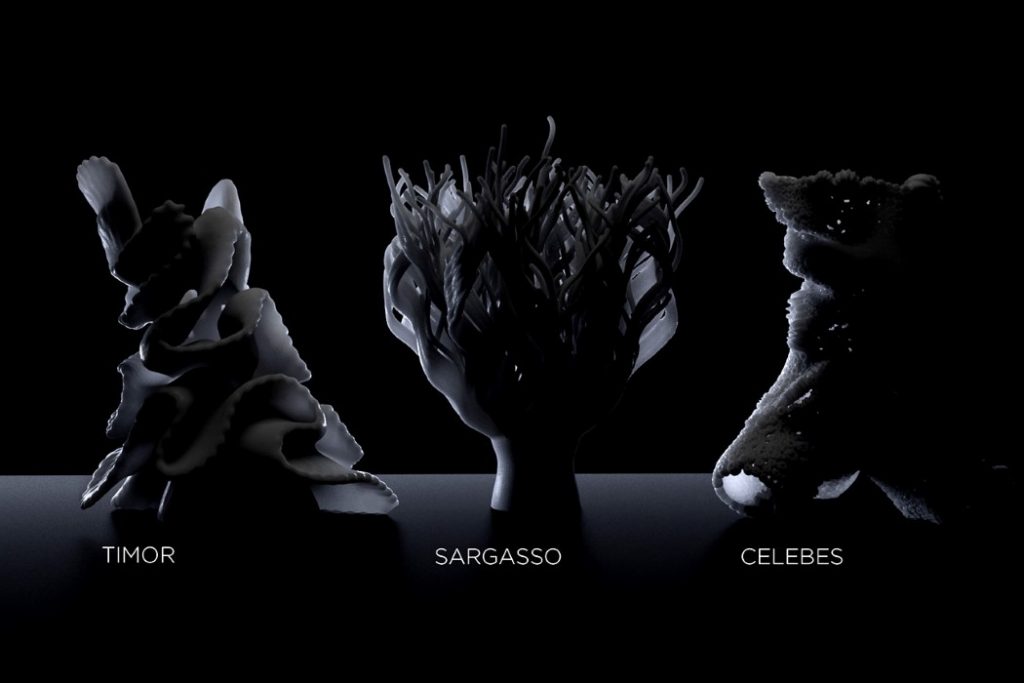
These lamp prototypes took their inspiration from different types of corals coming with varying aesthetics. Mauriello selected only three prototypes from hundreds of them to produce: the Timor, the Sargasso, and the Celebes.
Three members of Mauriello’s Coral Lighting Collection.
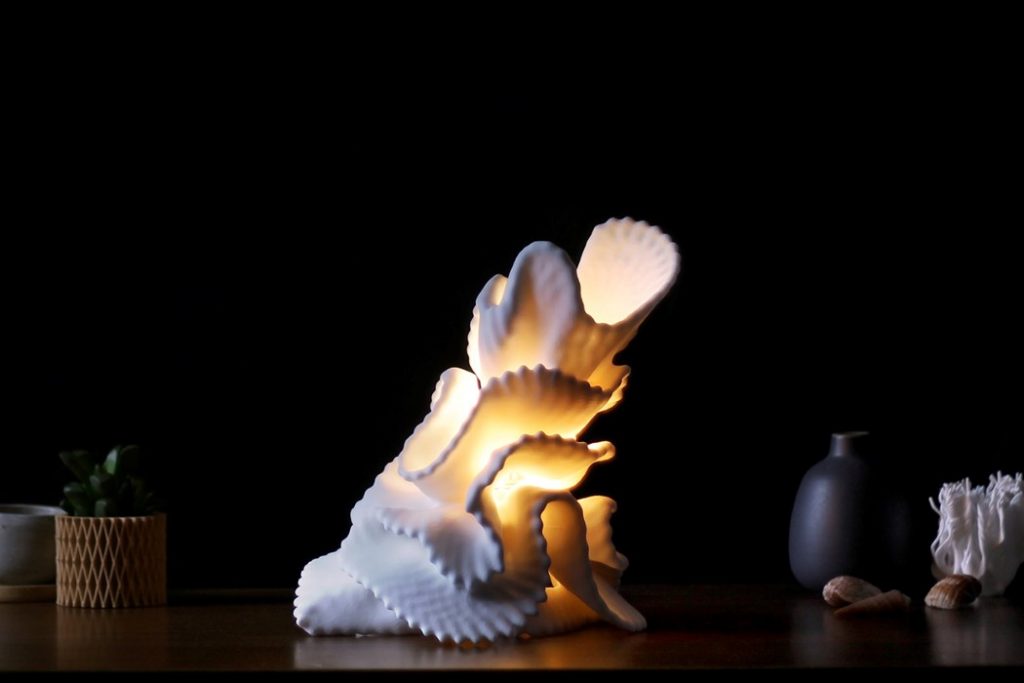
The 3d-printed Timor lamp
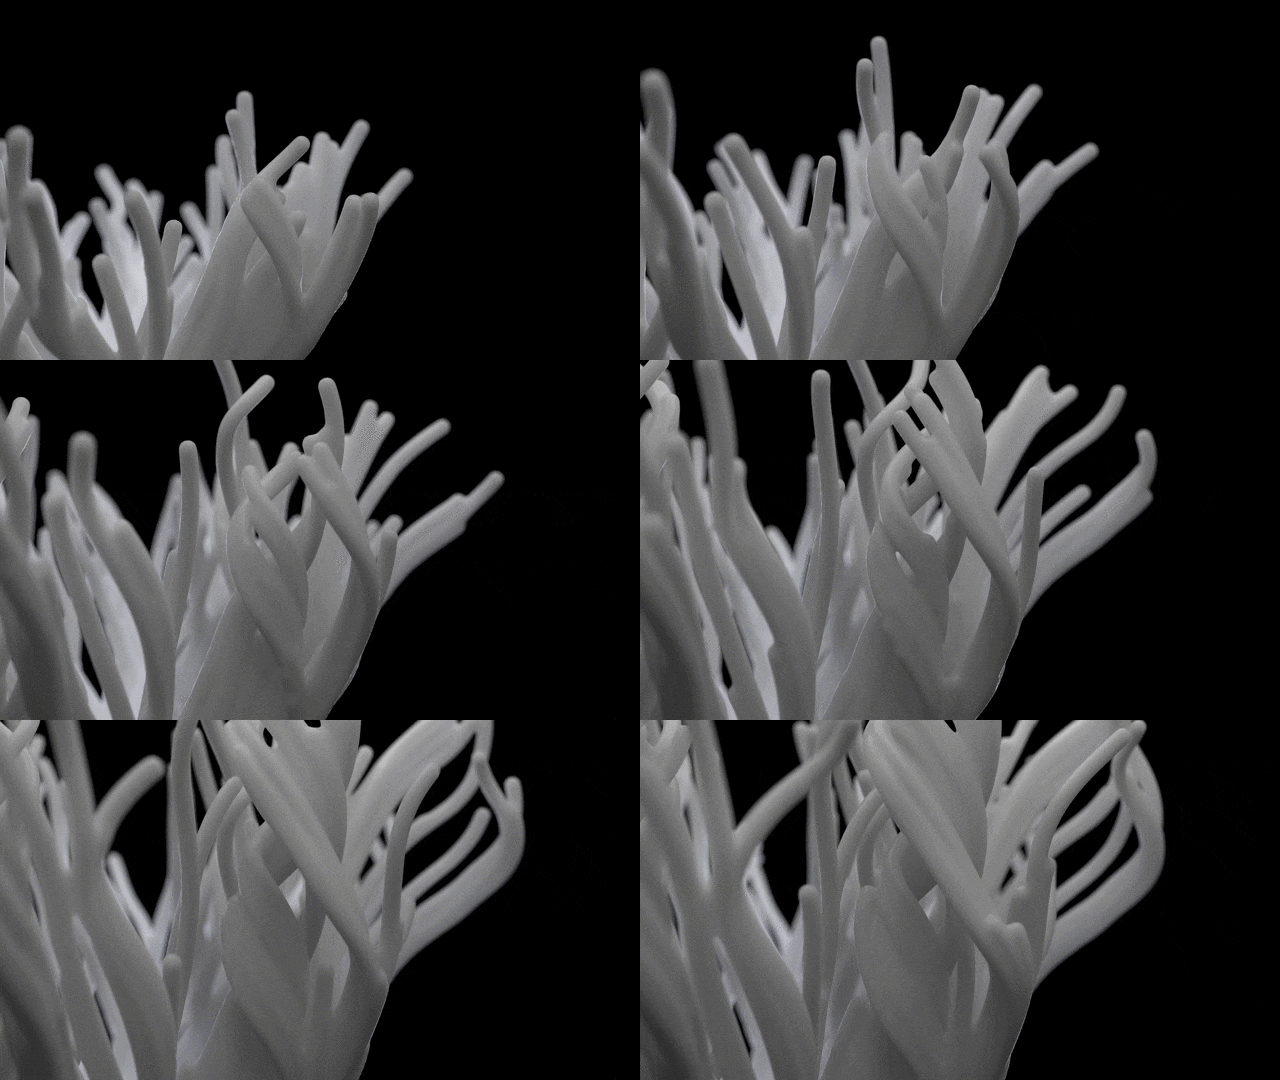
Before 3D printing these Coral Lamps , Mauriello firstly developed the computational algorithms that mimic coral growth patterns,which show the “growth” of the lamps as they come into being. And, more remarkable,all three lamps were 3D printed in the USA, using processes which recycle waste material in an attempt to reduce waste and curb carbon emissions.
The 3D animation is shown for reference only and not really a frame-by-frame recreation in the process of 3D printing the lamps. Instead, Mauriello wanted to make a video to simulate what corals look like underwater.
The Coral Lamp Lighting Collection is Mauriello’s way of paying tribute to the ocean’s beauty.As an senior surfer,Mauriello’ve experienced the beauty and power of the great ocean,in which coral is one of many magical living structures with all sorts of shape, scale and color.Mauriello’s lighting celebrates this thriving life created by an entire coral ecosystem.
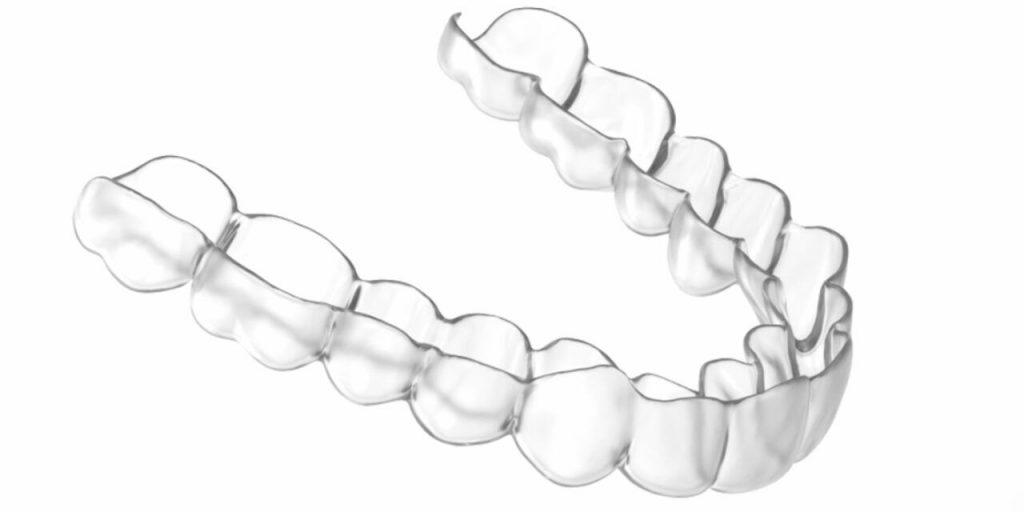
ArchForm, a clear aligner treatment planning software company, announced that it has opened a 3D printing factory for orthodontists aligners on demand On October 15, 2020 and decided to go public in December.
ArchForm produces aligner for half the price of other companies to rival industry leaders like Invisalign, Byte, Candid and SmileDirectClub. According to the company, ArchForm’s aligners are manufactured by robotic precision engineering with a multi-layer plastic material , and will can be delivered to a specific orthodontist within 10 to 14 days.
Invisalign reduces some of the costs of metal braces treatment.However,most of the orthodontists’ profit margins are controlled by parent company Align.They currently pays about $1,700 per patient to Invisalign, and other clear aligner vendors following the same regime. ArchForm is changing this pricing structure.With ArchForm, the cost for orthodontists to print a moderate-to-severe case in-office is reduced to $542, and each patient will be charged only $14.
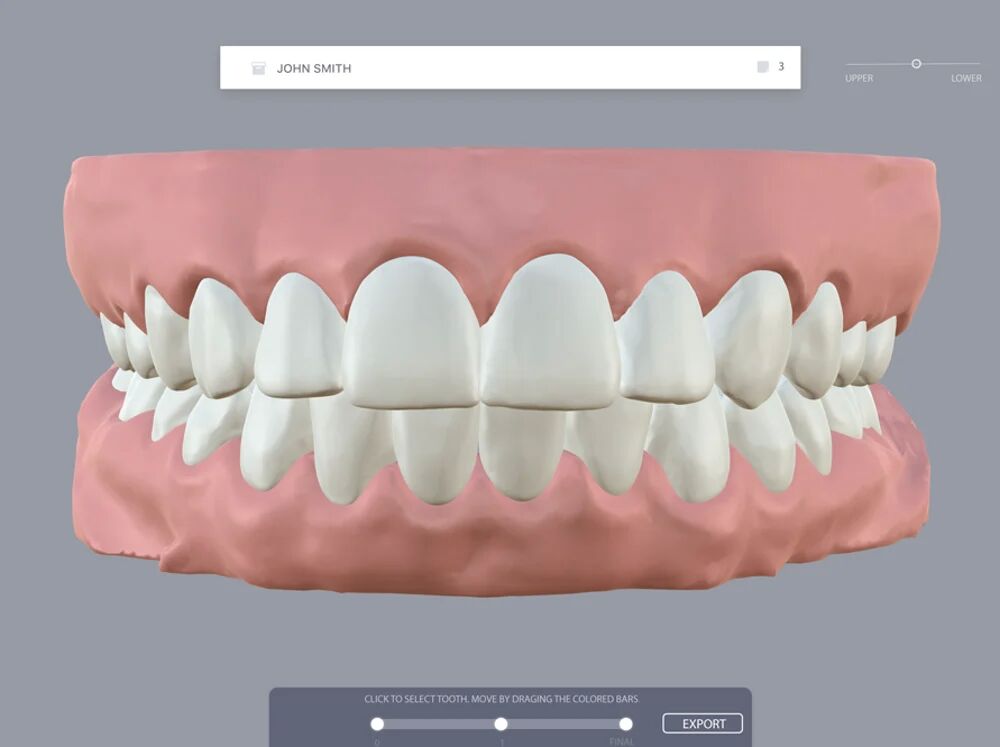
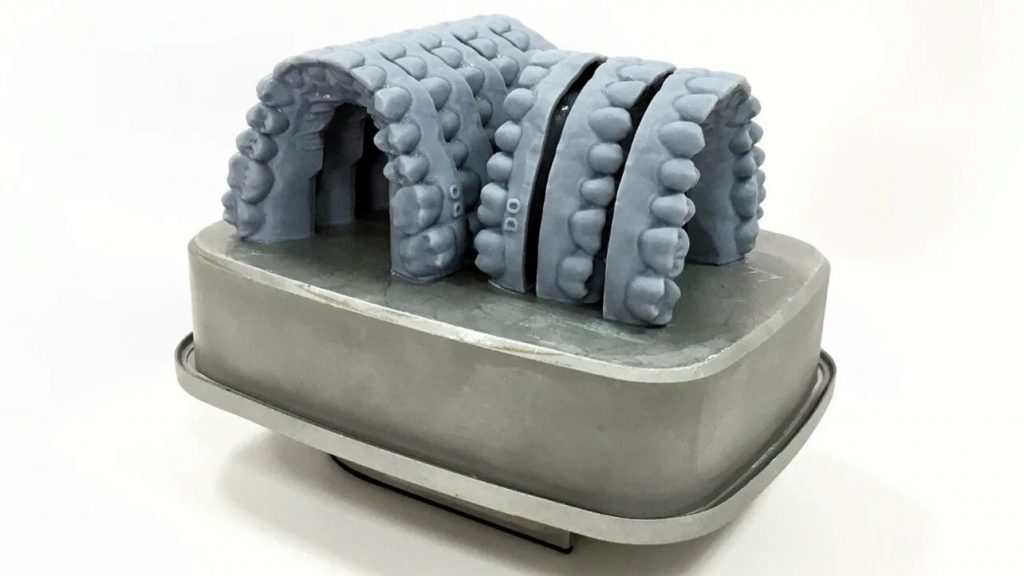
The production of dental aligners requires the use of professional 3D software to design a stepwise series of 30 to 40 aligner models that can adjust the patient’s teeth based on the scan data.The models are then 3D-printed and the actual aligners are produced by thermoforming biocompatible plastic over the models. With ArchForm’s software,Many orthodontist offices that already have 3D printers can save money and be allowed to plan cases faster with automatic one-click features.
For practices that do not plan to invest in 3D printers, ArchForm’s new plant is ideal for outsourcing the aligner designs.Using a higher-resolution 3D printer, three-layer plastic material, and a robot that is more comfortably precise than manual trimming, ArchForm claims to manufature more accurately shaped aligners with less visible layer lines.
Ideally, using ArchForm can help orthodontists to take digital scans at patient’s first appointment, 3D print the day’s aligners in their office labs, and then outsource the remaining treatment to ArchForm’s aligners. By reducing the waiting time from six weeks to four weeks, orthodontist can offer better service as a result.
Double Eleven (11.11) is the biggest sales event in the world of online shopping.Are you ready?Looking to maximise your savings this 11.11 Singles Day? Here’s a list of Geeetech products for 11.11 on Aliexpress with amazing campaigns full of special deals including 74% Off discount, $2.00 coupon with no other required conditions and so forth.You can also save $8 on every $150!This shocking promotion comes only once a year and you simply can’t miss out!
Our 11.11 Sale Is Here! Are You Ready For It?
Promotion for 3D printers,up to 35% off with $2.00 coupon,starting from $176. The max discount is as high as $100! Don't miss this sale!
Promotion for important 3D parts and other Geeetech products,up to 75% off with $2.00 coupon,starting from $1.01.
PLA filaments enjoy multiple discounts:
Buy 2 get 10% off;
Buy 3 get 15% off;
Buy 5 get 20% off.
Up to 25% off with $2.00 coupon,starting from $1.99.
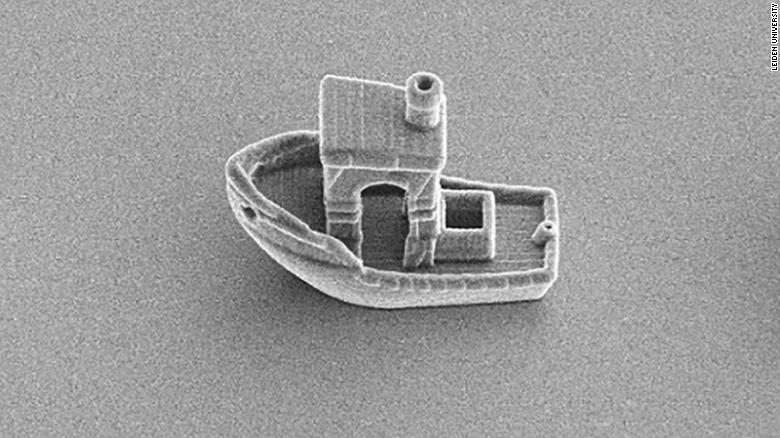
You must be surprised When you see the iPhone 12 mini for the first time , which is literally tiny by contemporary standards.In the real world, , we may think of a small thing as nothing more than a bean or a grain of sand, or even a strand of hair.But you know what, scientists used a 3D printer to create a 3D Benchy boat, the length of which is 1/3 the thickness of a hair, 6 times larger than a bacterial cell.
Researchers used a scanning electron microscope to photograph the ship for purpose of showing its open cabin, a chimney, and even a small porthole. What’s most impressive is that the entire model is very tiny, which means it’s even smaller than a statuet created by artist Jonty Hurwitz in 2014 as a potential design for creating a little drug delivery vehicle.
The researchers conducted investigations into small particles called microswimmers that can move through fluids, and be followed by a microscope.They created many structures , including a spiky sphere, a spiral, a trimer,a 3D Benchy boat and so on. Research shows that particles created in a helix shape can go around and be efficient.
“When it moves forward, often it needs to rotate, and that helps, for example, to speed it up.”Daniela Kraft said, a physicist at the Dutch university,adding that the small particle that goes to a particular part of the body to deliver drugs has to propel itself and may have to deal with the complex environment in human’s body.
3D printing opens up a universe of possibilities in manufacturing. Even at home, you can create unlimited possibilities with a Geeetech FDM 3D printer.However, the final printed model often has a lot of annoying layers that make the whole work look rough.It is only through some post-processing techniques that a smooth appearance can be achieved.The 3D printer filaments comes in ABS and PLA.PLA is more commonly used , which can’t react with the chemical like ABS.You have to keep sanding to get a smooth surface.Obviously this is hard and time – consuming.
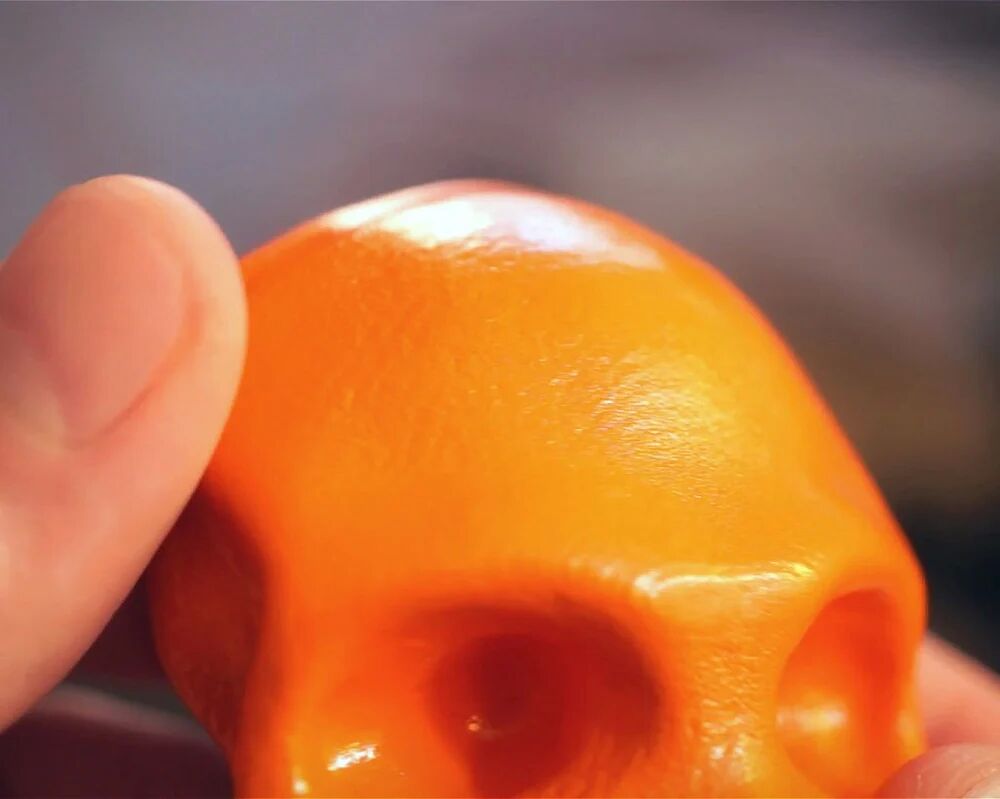
Fortunately, we can refer to 3DSage’s unique method of getting a beautiful look without using sandpaper.He printed a model of the skeleton as a demonstration. All you need is a can of spray paint that combines well with plastic (such as Rust-Oleum) and a bottle of Fast Drying Polyurethane – Clear Satin. Let’s get started!
3DSage shares the Skeleton model that he uses in his own example
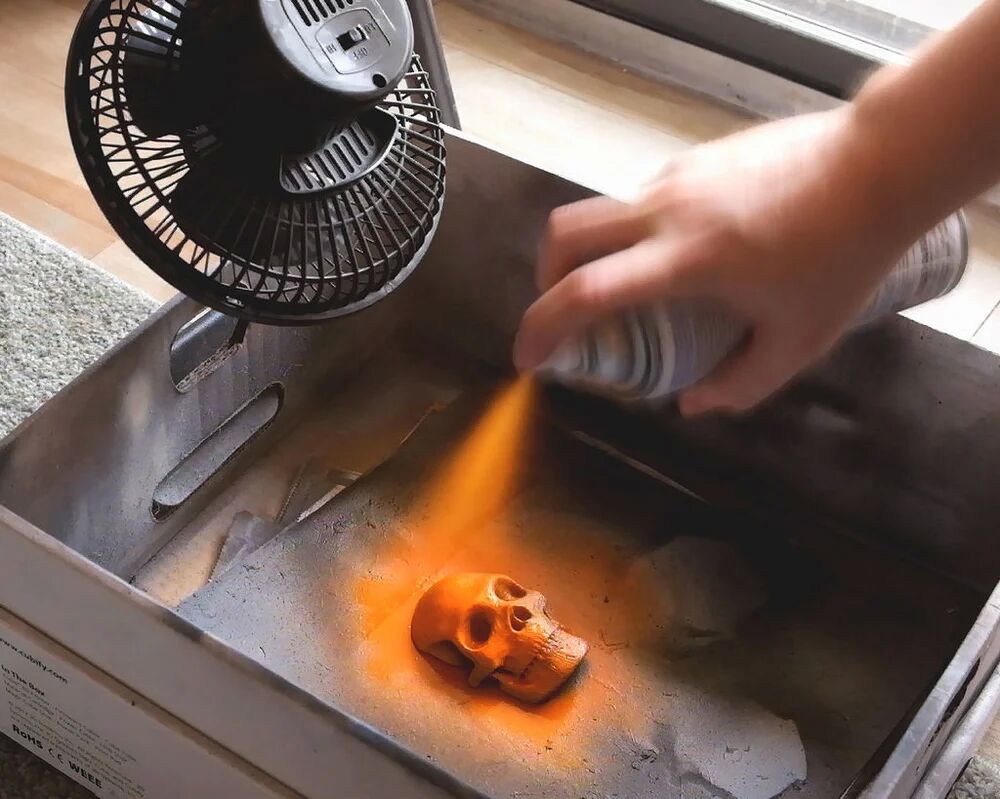
The first step is to check whether there is dirt or dust on the 3D printed model and make sure there is nothing superfluous on the surface.Apply a spray paint of your choice to the model, followed by a quick coat of polyurethane.
Next, to make the coating dry faster and prevent drips, you should carefully place the model under the fan.At this point you can see that the mixture of paint and polyurethane will blend into the layer, making up for any holes or unexpected imperfections and working best with thin layers and patience.3DSage said he waited for a whole day before adding the final coat of spray paint.And the time interval between layers is 20 minutes in order to prevent discoloration and make up for defects.
Put the coated 3D print under a fan to make it dry faster
When it comes to the benefits of his craft, The Maker says it allows him to print faster with a greater layer thickness.This process will mask any rough and unsightly appearance.And you can choose any color of paint.In this way,you get a smooth print model that doesn’t require polishing or other post-processing techniques.
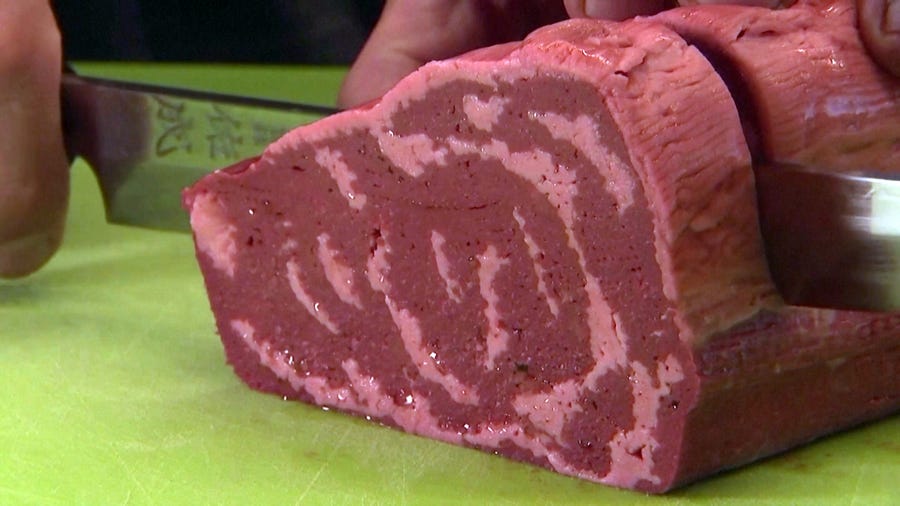
With the development of technology,3D printing technology gets more sophisticated and artificial meat hits more and more restaurants.So what if you combine these two?An Israeli startup has successfully created an artificial beef”steak”with 3D printing technology.
The start up Redefine Meat,founded in 2018,called on people to practice vegetarianism concept by 3D printing the steak instead of slaughtering animals for food.The company claims its steaks look,taste and feel just like real steaks,don’t require any real cattle to be involved in the production process,and are sourced entirely from natural,sustainable ingredients.What’s more,all the cooking methods,whether roast,slow cooking or grilling,can be applied to their artificial meat,which tastes even better than real meat.The good news is that it will be in high-end restaurants in Israel,Germany and Switzerland by the end of this year.
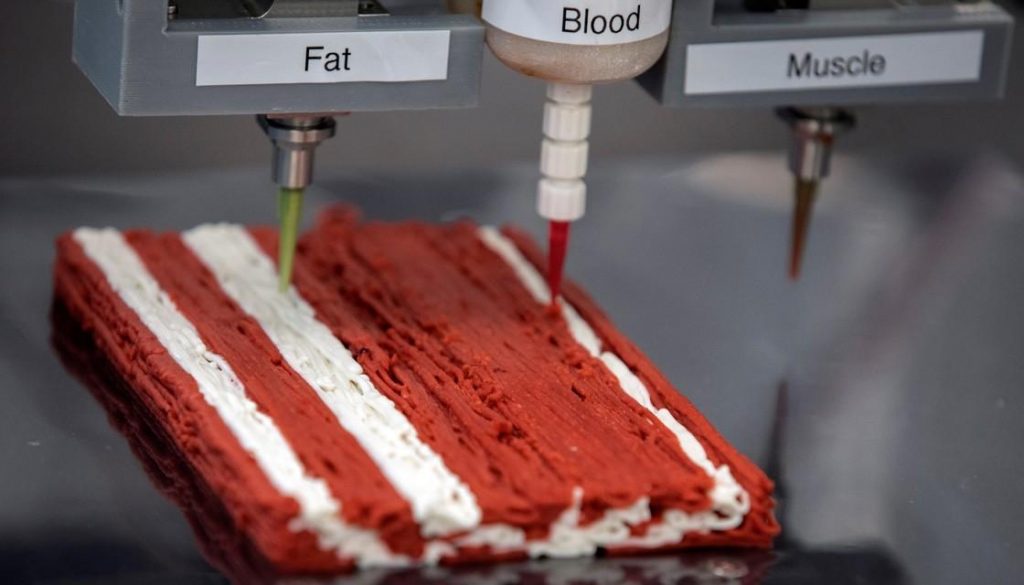
Redefine Meat uses:”proprietary 3D meat modelling,food formulations and food printing technology to deliver a new category of complex-matrix’meat’in a cost effective and scalable way”.The steak itself is made from a mix of soy and pea proteins,coconut fat and sunflower oil,plus natural flavors and colors everyone will love.
The 3D printer mimics animal muscle structure. Photo credit: Reuters
CEO Eshchar Ben-Shitrit specializes in manufacturing industrial-level 3D printers that will eventually be sold to meat distributors worldwide and become part of the meat supply chain.the CEO calls it”the best way to fight climate change,to deliver healthier solutions and food to the entire population of the planet.”It’s been reported that the coronavirus came from a sick bat,but it wouldn’t happen with the 3D printing meat,which is much cleaner.
The market for artificial meat has been very competitive in recent years,but Redefine Meat is focusing on expanding production by combining 3D printing technology with artificial meat production.
Are you bullish on this company?Will you try the 3D-printed vegan steak?Leave a comment below to tell me what you think.
I bought a Geeetech 3D printer the other day, downloaded free open-source designs for adaptive aids and printed out some plastic gadgets.I want to give my grandma a little surprise when she comes to visit me.
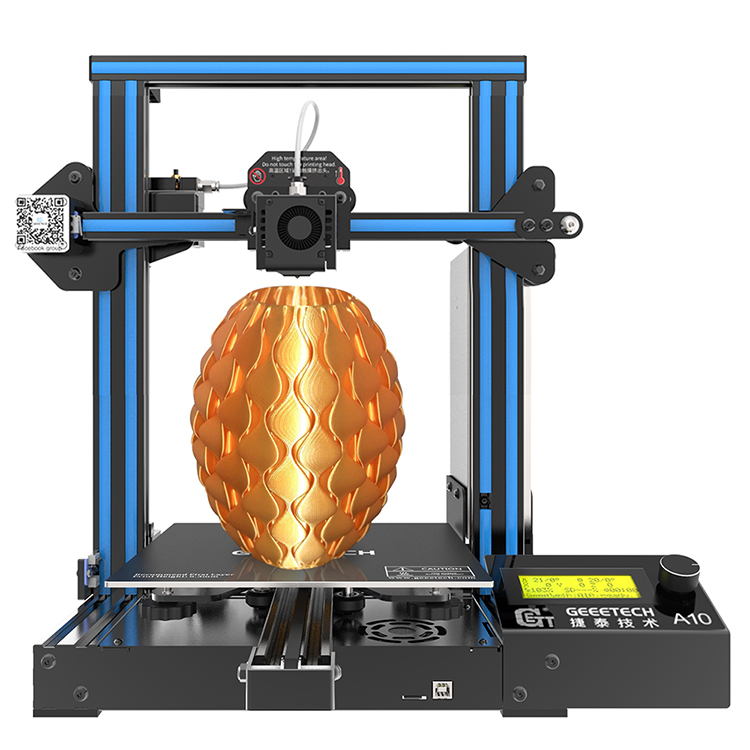
Geeetech A10 3D printer
My grandmother is suffering from arthritis which makes it painful for the joints to move.Owing to this physical ailment,her daily life is very inconvenient.As an example, she found routine tasks like opening jars and even holding a toothbrush to be troublesome and painful.I hope to improve her quality of life through these plastic gadgets.
When grandma first saw these gadgets,she feeled elated andtold me this is one of the best gifts for her.It is known to all that adaptive aids in the shop are vastly more expensive than the standard gadgets and that is why she got so excited.Finally I decided to show her how the gadgets were printed by the Geeetech 3D printer.However,She complained that printer costed too much.So I made a careful calculation with her-a typical adaptive aid costs about $25,and we use a 3D printer to print gadgets for $1 each.We save money by printing more, and there are a lot of possibilities.She wholeheartedly endorse my remarks.
Here are some of the gadgets I gave her:
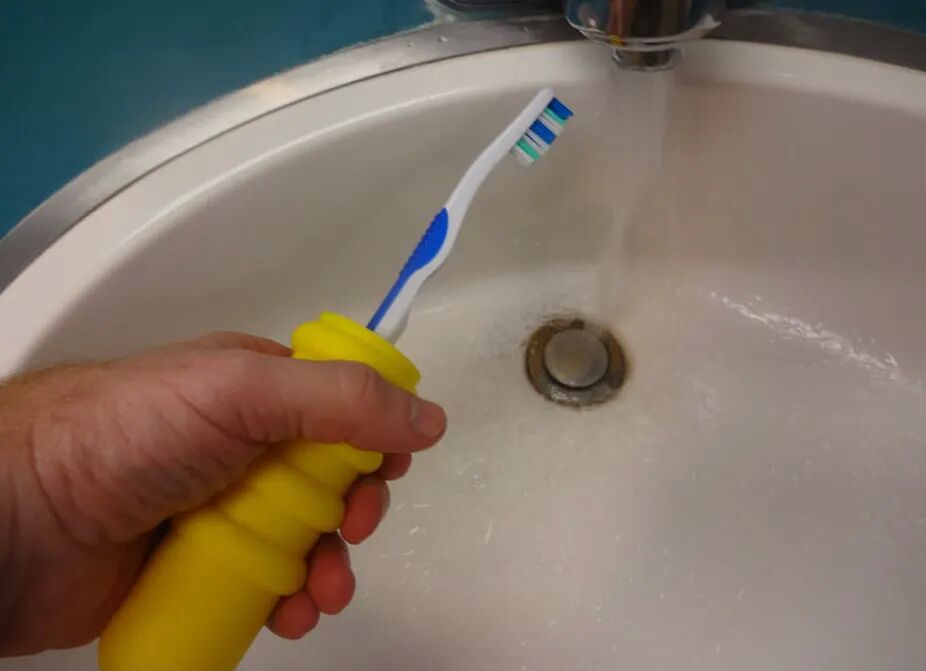
Easy to hold the toothbrush. J.M. Pearce, CC BY-ND
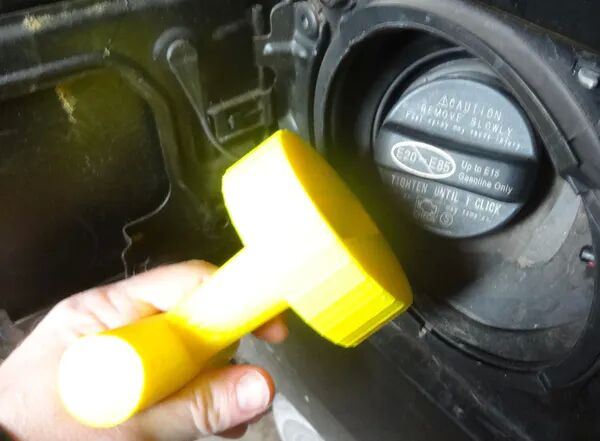
Easy to remove gas cap. J.M. Pearce, CC BY-ND
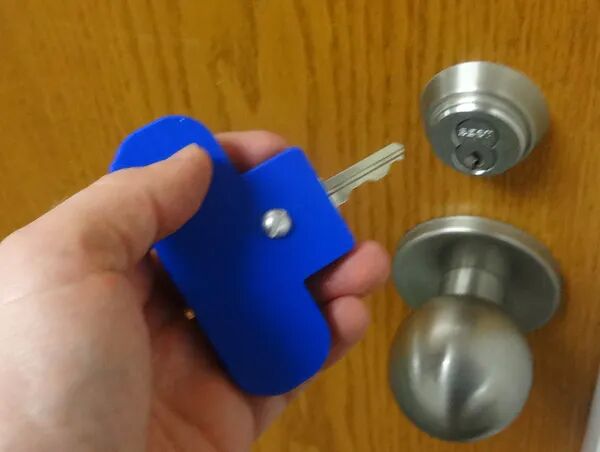
Easy to open locks, even with very small keys. J.M. Pearce, CC BY-ND
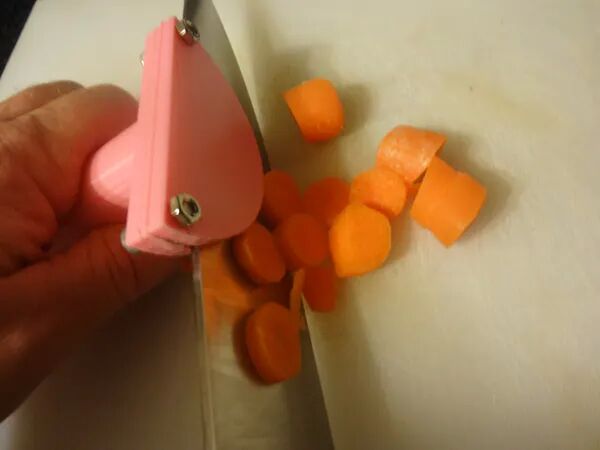
Easy to Cut the vegetables. J.M. Pearce, CC BY-ND
Easy to use scissors. J.M. Pearce, CC BY-ND
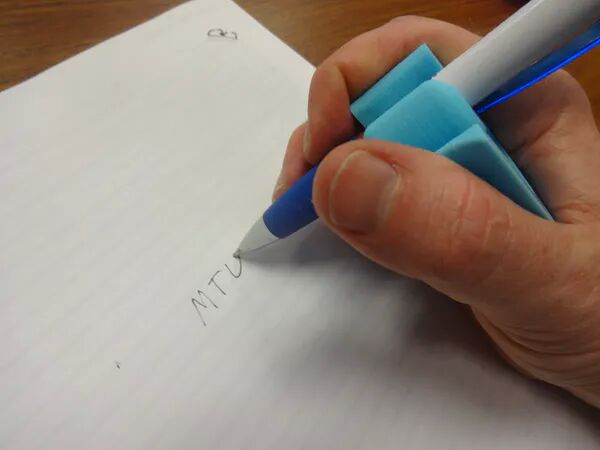
I printed a 3D printed pen holder for her as she used to keep a diary. J.M. Pearce, CC BY-ND
I’m pretty sure there will be more 3D printing applications in the future.Why not get one for a try?
without a doubt,you can’t bear some minor flaws in the face of a 3d printing model, let alone “String”.You complained that this printer is such a trash Contrary to expectations.At that time,You may get mad but it will eventually ending up in a mess.
So firstly you need to calm down.Take a close look at what the problem is,make it clear that how it happened and how we can solve the problem.Let’s dive in.
What’s the Problem?
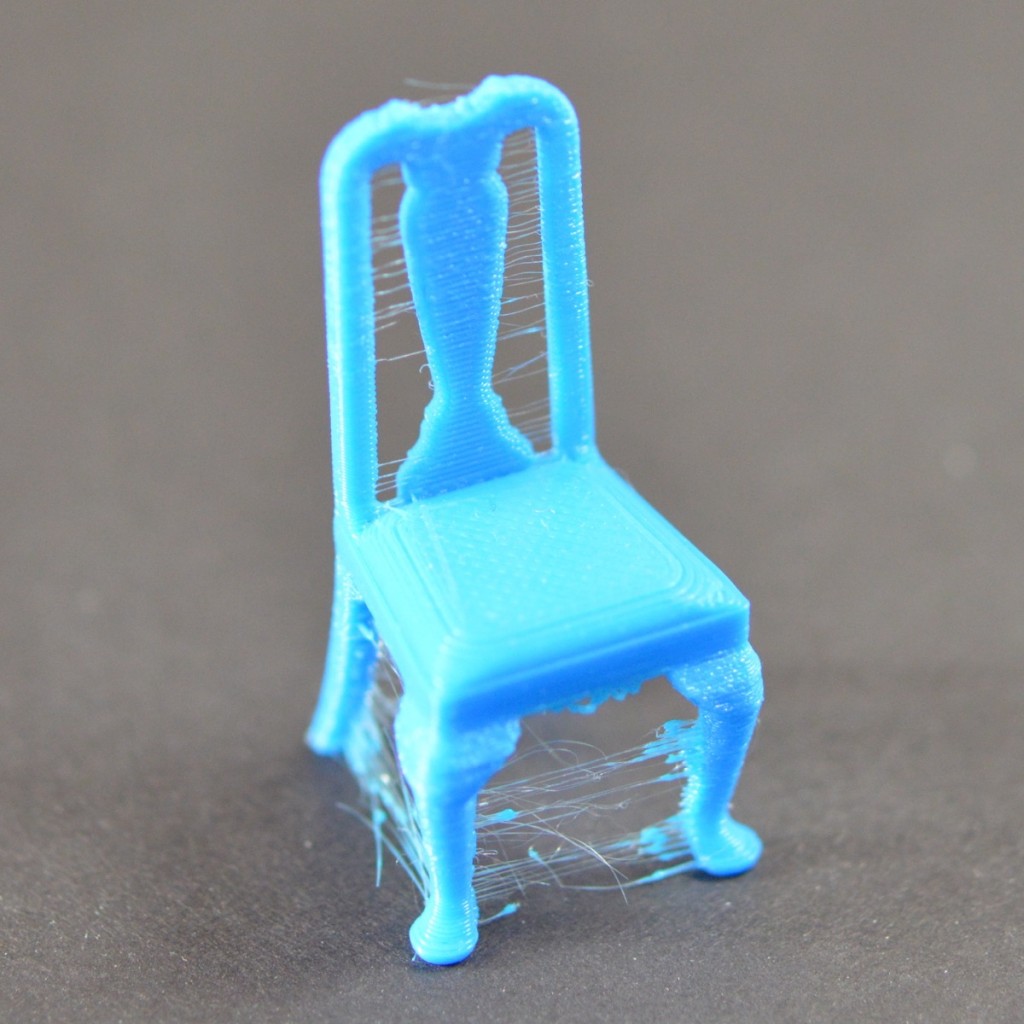
Stringing exists when small strings of plastic are left behind on a 3D printed model. This is usually due to plastic leaking out of the nozzle as the extruder moves to a new position.
Finished print affected by stringing
How to fix this?
In this article, we’re going to look at 5 Solutions that are common to all the major 3D printers.
1.Enable Retraction
Enabling retraction is the most ordinary way used to fight against 3D printer stringing. Enabling retraction means that means that when the extruder has to pass through a gap, the filament is retracted a little bit by the feeder.Once the extruder reaches the next position, the filament is pushed out and the print continues again from the nozzle.If the retraction setting is turned on and you’re still experiencing 3D printer stringing, you may then need to go into the details of the retraction settings:
Retraction distance
The most important retraction setting is the retraction distance. This determines how much plastic is pulled out of the nozzle. Generally speaking, the more plastic that is retracted from the nozzle, the less likely the nozzle is to seep out as it moves. Most direct-drive extruders only require a retraction distance of 0.5-2.0mm. If you run into stringing with your prints, try increasing the retraction distance by 1mm and test again to see if the performance improves.
Retraction speed
The next retraction setting that you should check is the retraction speed. This determines how fast the filament is retracted from the nozzle.If the retraction is too slow,the plastic will slowly leak out of the nozzle and may begin to leak before the extruder moves to its new position. If you retract too quickly, the filament may separate from the hot plastic inside the nozzle, or the rapid movement of the drive gear may even grind away pieces of your filament. There is usually an optimal point of retraction between 1200-6000 mm/min (20-100 mm/s) .
If standard retraction isn’t doing the trick, try reducing the minimum travel. This is usually the quickest solution to fix stringing issues. Drop the value by 0.5mm until the stringing has stopped completely.
2.Set the Right Temperature
The extruder temperature is the next most common cause for stringing.If the temperature is too high, the plastic inside the nozzle will become less sticky and more likely to leak out. Whereas, if the temperature is too low, the plastic will be kind of solid and difficulty in extruding from the nozzle. If you feel you have the right retraction settings, but you’re still having these problems, try decreasing your extruder temperature by 5-10 degrees. This will greatly improve the quality of your printing.
3.Movement Speed
Moreover,increasing the movement speed of your machine can also reduces the time it takes for the extruder to leak as it moves between parts. The X/Y Axis Movement Speed represents the side-to-side travel speed, and is frequently directly related to the amount of time your extruder spends moving over open air.As long as your machine can handle moving at higher speeds, increasing this settings may reduce stringing between parts.
4.Thoroughly Clean the Nozzle Before Printing
When you use a printer for a long time, the filament can leave a thin layer of residue in the nozzle. This thin layer can cause 3D printer stringing as filament strands will try to stick to the surface of your printed part.
To avoid this type of problem, ensure your nozzle is thoroughly cleaned before any printing to remove any dirt from the previous filaments.
5.Keep Your Filaments Moisture-Free
PLA, which absorbs more water than ABS, is the main culprit.The water turns to steam when the plastic is heated up, and it can mix with the plastic to increase the likelihood that it will seep out during non-printing movements.
When you use a 3D printer to print everyday items, have you ever thought that you could even print an organ of your own body?It’s hard to believe, but it happens.That’s what CollPlant Biotechnologies and United Therapeutics Corporation are looking to do: they have just expanded their collaboration to 3D bioprinting of human kidneys for transplants.
Currently, more than 100,000 people in the United States are waiting for organ transplants.Kidney patients account for most of the demand, with more than 90,000 people seeking donor organs.Statistics show that 17 people die each day while waiting for new organs.At the same time, a new patient is added to the waiting list every ten minutes.So the American company United Therapeutics paid the Israeli company CollPlant 3 million dollars to speed up the production of the famous Bioink, called rhCollagen.This will provide ideal characteristics for bioprinting, including optimal rheology, greater safety, bio-compatibility and adjustable physical properties.It can also be compatible with a variety of technologies such as extrusion, inkjet or stereolithography.
Bio-printing is a particularly interesting technology for the medical sector, allowing the creation of human tissue and treatments that is suitable for each patient.Every day, methods are evolving and innovations are emerging, which means we’re sure to see functional organs being 3D printed within a few years.The good news for those waiting for transplants is that Bioprinting can design livers, pancreases, spleens and even kidneys.The companies CollPlant Biotechnologies and United Therapeutics Corporation have recognized that this technology could be the future of tailor-made medicine.
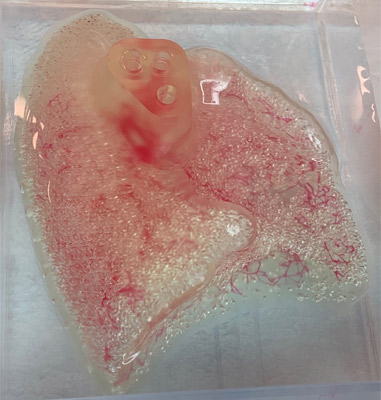
In October 2018, the two companies began a collaboration: United Therapeutics received an exclusive license for the CollPlant technology to produce and use bioinks based on human collagen for bioprinted lung transplants.Two years later, the partners began working on a kidney, an organ in need of a donor.CollPlant Bioink is made from human collagen.It requires very strict purification conditions, which makes it extremely long to process, but most importantly it is difficult to produce on a large scale.So the Israeli company relies on a plant platform to produce collagen.They explain: “The production of our recombinant human type I collagen (rhCollagen) starts in genetically modified tobacco plants. The recombinant human protein in the form of ‘procollagen’ is extracted from the leaves of mature plants and processed to produce a highly purified rhCollagen that can be used for the production of medical products.” This innovation will help develop bioprinting and regenerative medicine, provide an opportunity to create quality bioinks for the eventual design of different types of organs.
Thanks to the attention paid by the American United Therapeutics Corporation,the manufacture of kidneys is being addressed in hopes of reducing the number of patients waiting for transplants.
If you have moisture and mold in your home, you’re more likely to have respiratory problems, allergies and weak immune system.When you know the cause of the moisture, you can take steps to limit the moisture in the air.
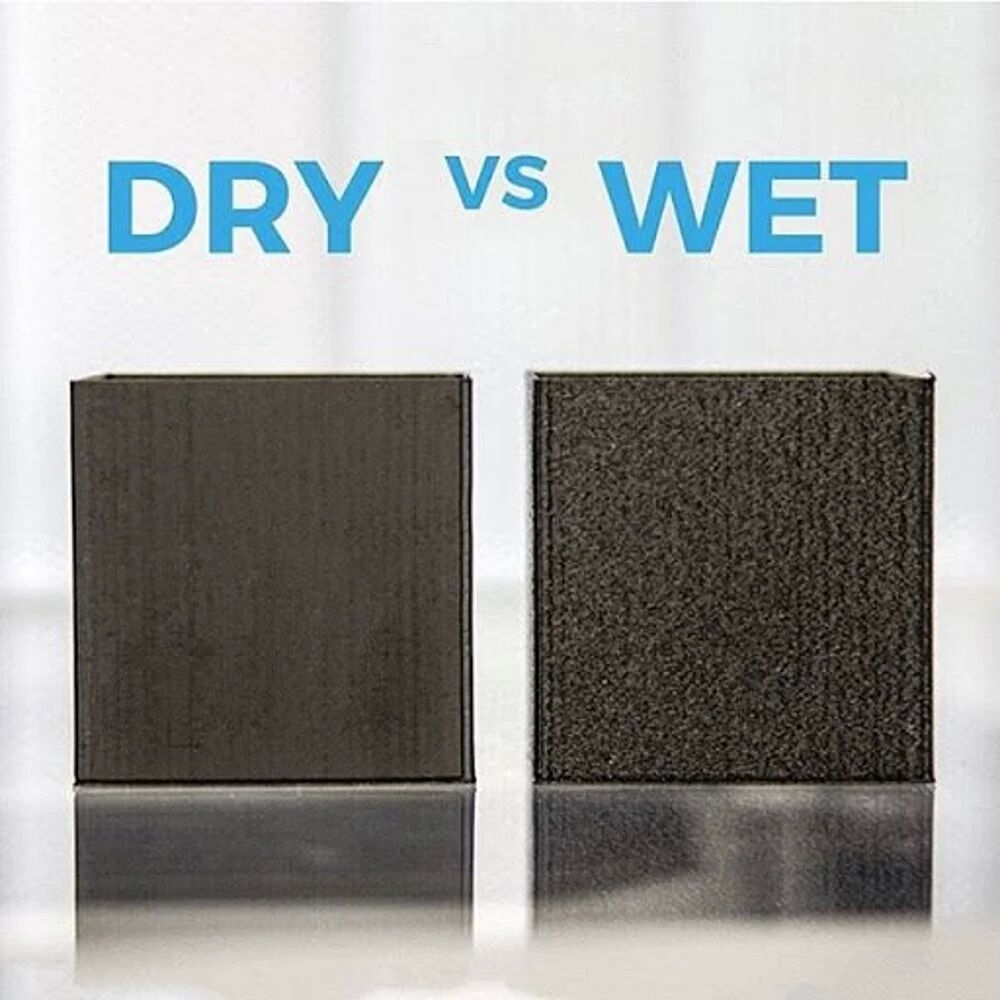
Likewise, humidity is a natural enemy of filaments.Some materials have no humidity problem.Others, such as PVA or nylon, are very hygroscopic and absorb water after a very short time.The wet filament sizzles and is easy to recognize during printing, and the results are terrible.
Therefore, it is particularly important to store filaments spools carefully and correctly.
A comparison of dry vs wet filament. Source: Matterhackers
Why Water Damages Thermoplastics
All plastics are polymers or copolymers. you’ll see that the long molecular strands that make up them are woven together when you look at polymers or copolymers under a high-intensity microscope,That means there’s plenty of space between and around the strands.Thererfore, most polymers and copolymers are hygroscopic.Some filament materials, such as Nylon, are very sensitive to water .If they absorb only a little water, they can cause problems when printing.
How To Keep Your 3D Printer Filament Dry
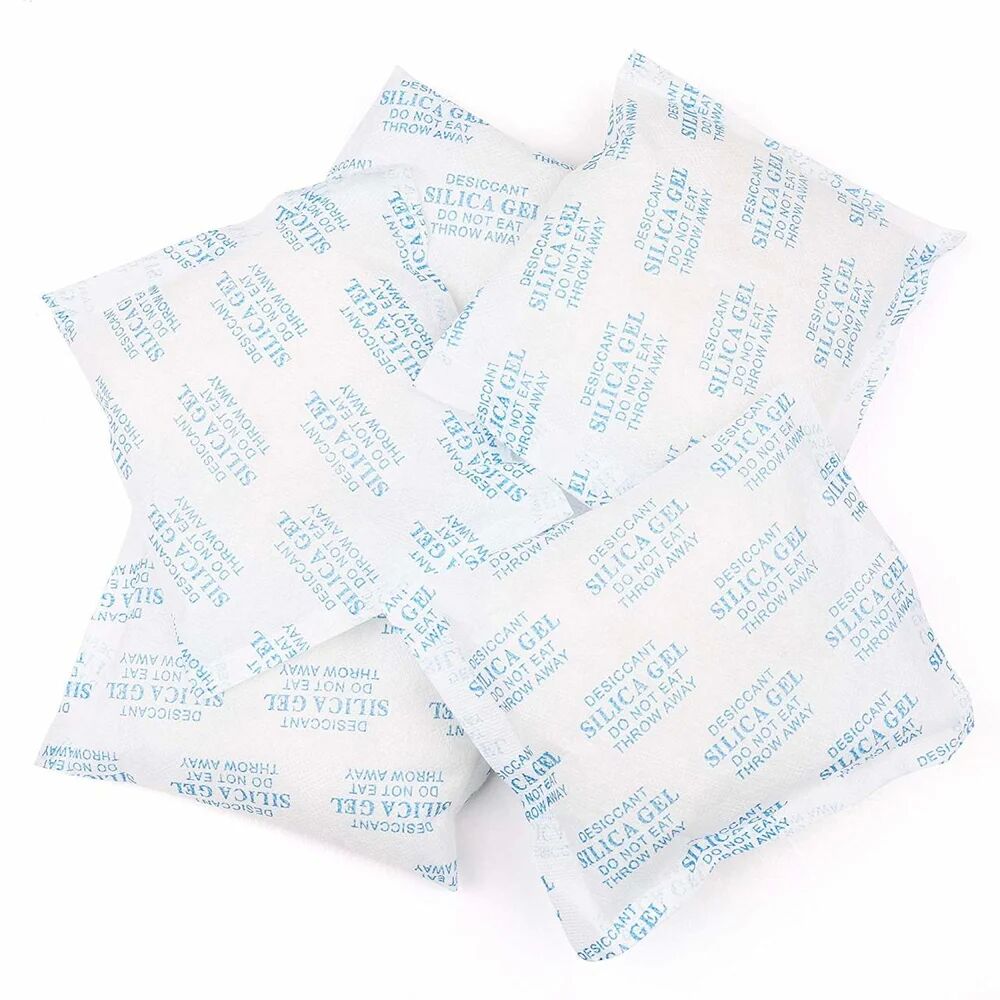
Storing your filament in an airtight container with a desiccant is the easiest way to settle this issue.Filament dry boxes work well, but they can be bulky.
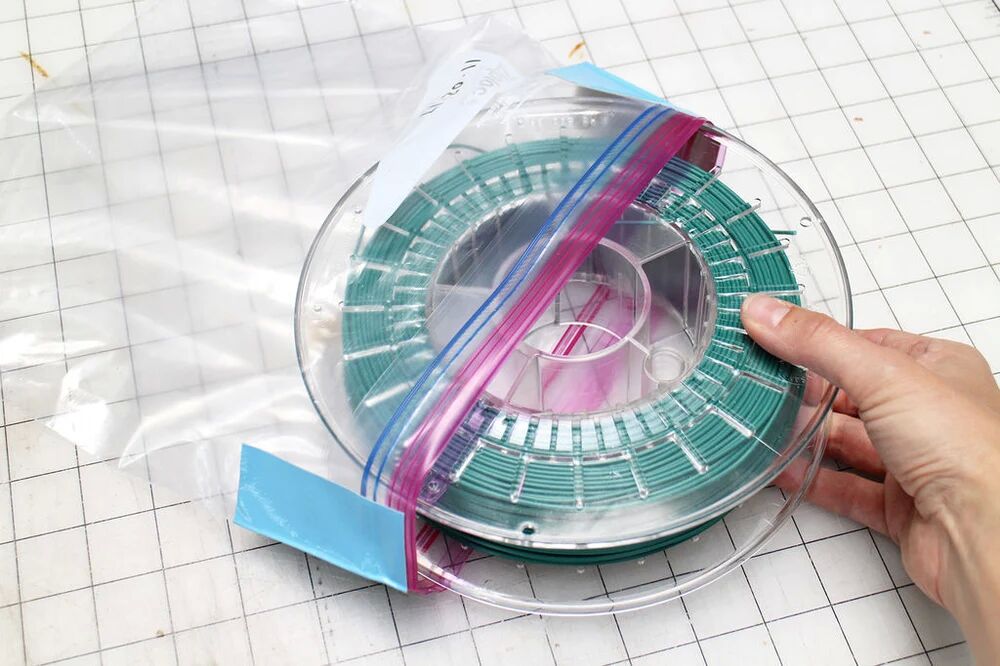
when it comes to airtight,most people think of plastic containers and bags.For the most part, these are good short-term solutions.
This is the cheapest way to store filament spools. Source: Paige Russell / Instructables
Nevertheless, over time, plastic containers and bags become slightly permeable.This means that the longer your printing materials stay in plastic bags, the more water they absorb, .especially when you live in a humid climate. .If you use a clear bag or box, UV light will also reduce the strength of the filament over time.
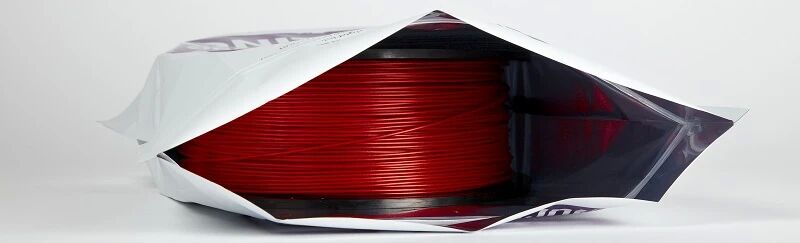
Using high-quality Mylar bags or bags made of similar materials is a better solution is to store your thermoplastic.Obviously, there is a layer of metal between two layers of plastic.
This metal layer protects your printing material from any water vapor that permeates the plastic.So that your printing material produces a satisfactory result.
Mylar bags protect your printing material from water vapor.Source: rigid.ink
Desiccant packets keep the humidity in the containers to a minimum. Source: Amazon
How You Know Your Printing Material Has Absorbed Water
Before printing, there are two simple ways to determine if your material is absorbing water.First, you can measure the diameter of the material itself.when a polymer absorbs water, it begins to grow in size.If the diameter of the filament increases by 10 percent or more, it most likely absorbs water.
Another way to determine whether a filament absorbs water is to extrude a small amount of filament before printing.We’ve all probably been there: sitting by a fire, listening to its crackle.This is because the water in the wood is changed into steam when heated.The same phenomenon occurs when you extrude thermoplastic that has absorbed water.The heat from the print end causes the water in the plastic to expand and escape.You can hear hissing or popping and also see bubbles.
How to Dry Out Filament
If your filament is wet, you must dry it out before using it to print.Why not use an oven?
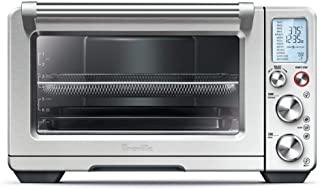
Once the oven it up to temperature, place the spooled material inside.Source: Amazon
In the first place, check out the glass transition temperature for the filament that you are going to dry.You need to be sure that you keep your oven temperature below the transition temperature. In a general way , about 60-70C is just about right for most materials, except may be a bit hot for lower temp materials like PLA. Always keep in mind how hot your oven runs and only use electric ovens.
You should also be aware, even if the Glass Transition temp is very high, for a material like Nylon or Polycarbonate – the spool your filament is wound on is likely made from an ABS which will soften at lower temperatures than the filament.
How to dryPLA filament
You ought to be more careful when you dry PLA filament on account that 70C will be too hot. We recommend at the very lowest temp your oven will go around 40C. Even at this temp your PLA will soften, so drying PLA in the oven won’t always give you the results you’re after. It’s a small reminder as to the importance of keeping excellent PLA storage.
Once the oven it up to temperature, place the spooled material inside and leave it there for four to six hours. If you have a convection oven, this drying time may be shortened since the circulated air removes more moisture from the material more quickly.You can also ‘recharge’ the desiccant this way too, placing it in the oven over a low heat.
Once the time is up, remove the material from the oven, allow it to cool and place it into a water impermeable container or bag along with desiccants. Make sure that the container or bag is completely sealed.
Any material that you have oven-dried is slightly more brittle than normal.Remember,Handle the material with care.Only then can you achieve the superior results with your properly dry print material.