Nowadays, desktop 3D printers that come with 2 extruders are more powerful and affordable. Still, many, especially beginners are intimidated by those dual extrusion systems. In light of this, i am presenting to you this step-by-step guide to dual extruder 3D printers in the hopes that you will be able to operate one yourself in the end.
Before reading this article,please make sure you have already read the set up guide of the version of 13B single extruder and you are able use it to print 3D models. If not, please learn how to operate the single extruder. Of course, you can take this one as the single extruder version to get started.
Step 1
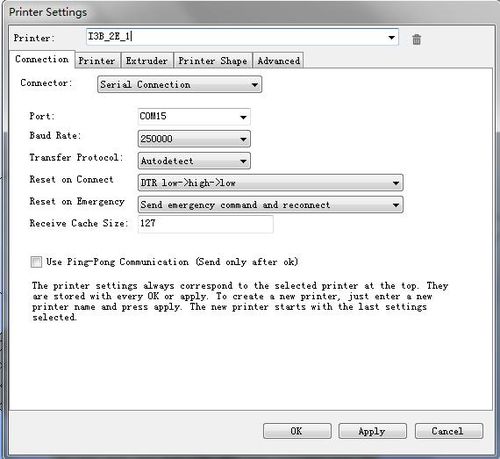
Open Repetier Host,click Config/Printer Settings to set up the connection.
1. Name your printer.
2. Select the corresponding COM port and baud rate. Baud rate is generally 115200 or250000.
3. If you are not sure about the COM port, you can check it in your device menager.
Step 2
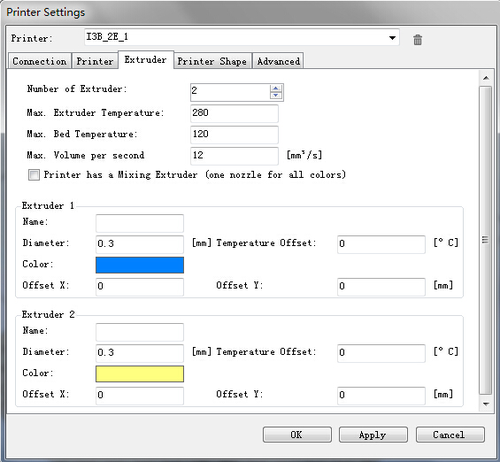
Set up your extruder
1.Choose the number of extruder, here we choose 2.
2.Select the diameter and color of filament
3.Offset X/Y refers to the distance between the two extruders,which can be adjusted based on real situations. You can leave it alone now.
Step 3
Set up the shape of printer
Choose Classic printer as the printer type.
Home X: min Home Y: min Home Z: min
Print height: 150
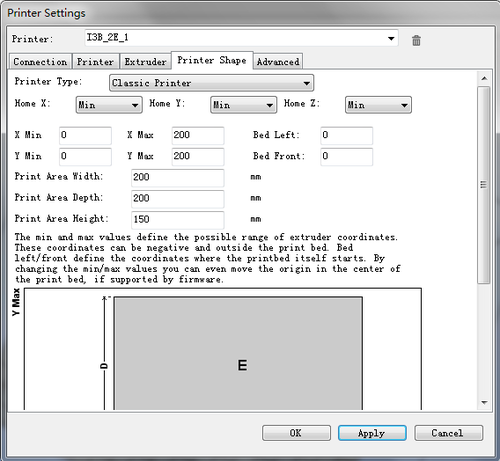
Now,you can click the Connection button on the left corner to check whether it can connect with your printer. If it fails, please recheck the COM port and Baud rate.
Step 4
Manual control
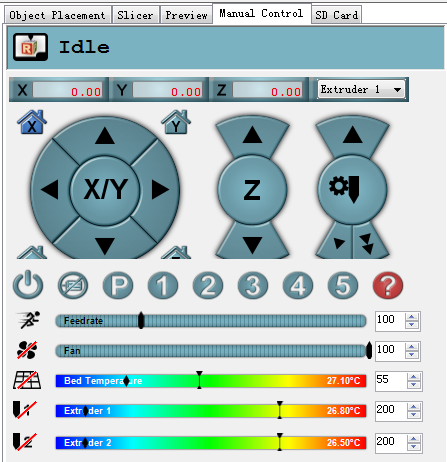
1. X home
Click X home to home the X axis, or you can click the right/left arrow to move the axis to check whether the direction and distance is correct or not;
2. Check Y axis and Z axis respectively in the same way
3. Click the icon of heated bed on RH to heat up the bed. observe whether the temperature is rising to a pre-set value
4. Click the icon of heated bed and extruder, observe whether it is heating up to the pre-set temperature and keeps at that value
5. When the temperature for the extruder surpasses 170 °C , choose extruder1 and extruder2 respectively, you can move them and check their directions
Step 5
Leveling the two extruders.
Leveling the two extruder is very important if you want to print with two extruders at the same time.
First, you can adjust one extruder to make it parallel with the surface of the heated bed (the same way you level for a single extruder setup) , click the button of Z home to adjust the distance between the nozzle and the heated bed, make sure the vertical distances of the nozzle to the four corners of the bed are the same.
After that, tweak the distance between the second extruder and the heated bed by adjusting the screws, as shown in the following picture: Loose the screws, and then you can move on to get the right distance between two extruders and heated bed.
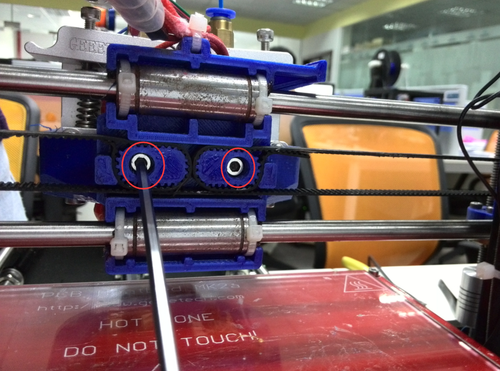
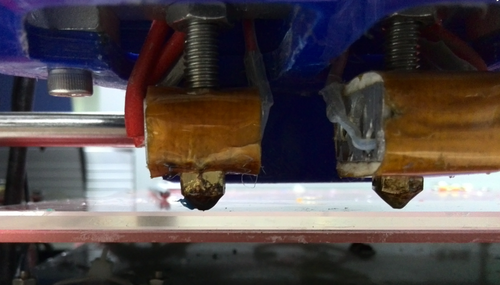
you may need to repeat this step to get it all right.
But it’s worth it. Once you get it done correctly, you wouldn’t need to do it again.
The settings mentioned above are on Repetier Host,which only involves the control of 3D printer and the preview of model.
All the settings do not concern the print result but slicing. So we will continue with the slicing setting. The slicer is independent of Repetier Host. So,should we set up the slicer now? Take it easy. Let’s see whether our printer can run normally.
Step 6
If the printer goes well. We can go on with the slicing. First let’s get a quick view of the slicer.
RepetierHost supports many slicers, with Slic3r and CuraEngine being the most popular; Slic3r is more powerful in terms of functionality, but CuraEngine comes with more optimized slice velocity.
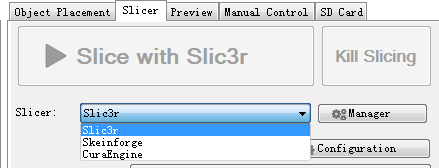
You can choose slicer here. Upon selecting the slicer, please click Configuration.RepetierHost will bring up a wizard of the corresponding slicer that will walk you through the configuration.
Here we take Slic3r as a demonstration. As to the configuration in CuraEngine,we will pick it up in the follow-up study in our forum www.geeetech.com/forum/, so, please stay tuned. If you are experienced in CuraEngine, we would appreciate it if you cou.ld share your insights with us.
Next, download the file:two_color_cube.zip, unzip the file and save it somewhere.You will need it later.
Step 7
Click Configuration,open Slic3r

Step 8
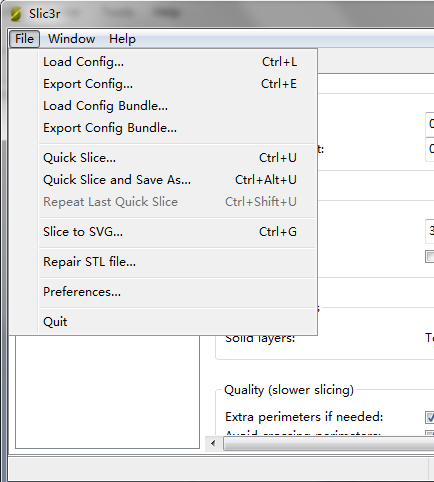
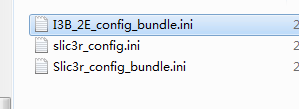
We have prepared a set of parameters for I3B_2E dual extruder, that is, I3B_2E_config_bundle.ini. You will need import those parameters to slic3r from here.
In Slic3r, under file> Load Config Bundle.. navigate to the folder we just downloaded and unziped, open I3B_2E_config_bundle.ini,
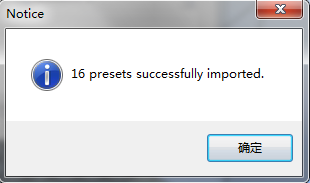
Step 9
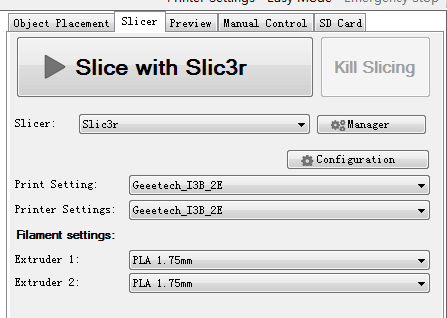
After loading, you can find the option of Geeetech_I3B_2E in the drop-down menu.
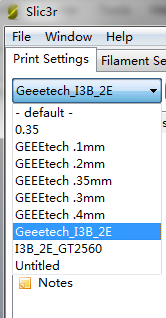
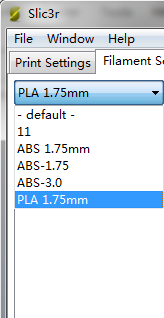
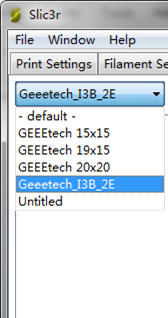
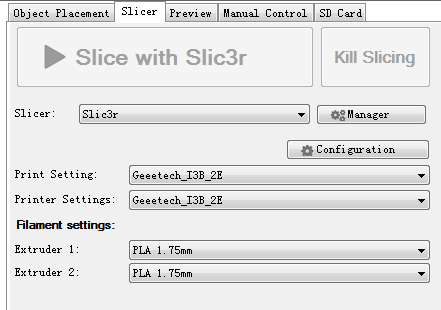
In my case, i use the geeetech pro C model,(i refer the I3B_2E in this article),extruder is MK8(1.75cm-0.4mm),PLA filament, so we choose Geee_I3B_2E, PLA 1.75mm, and Geeetech_I3B_2E respectively .
All the parameters you set can be saved in RepetierHost for future reference.
Step 10
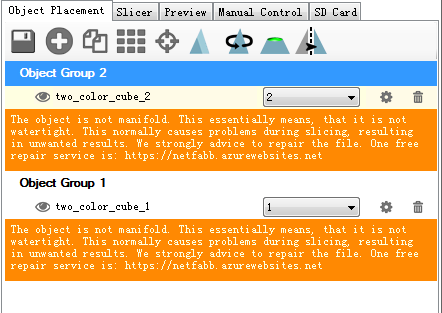
Unzip two_color_cube.zip,click Load to import the .stl files,choose two_color_cube_1.stl and two_color_cube_2.stl respectively.

Actually, two_color_cube is composed of two .stl files. each printed by one nozzle.
After loading, you can preview it. The two files are separated.Now you need to adjust the locations to combine them together.
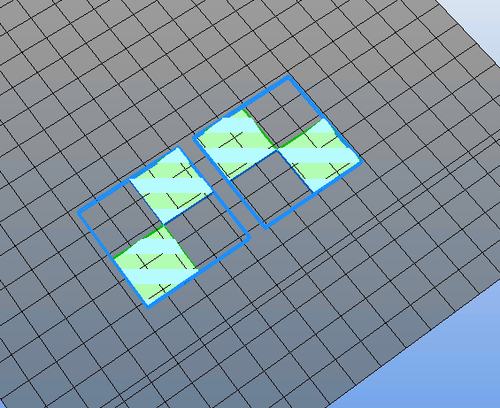
Select Object Group 2 and click center, then Object Group 1 and center. Now the two models are combined as one.
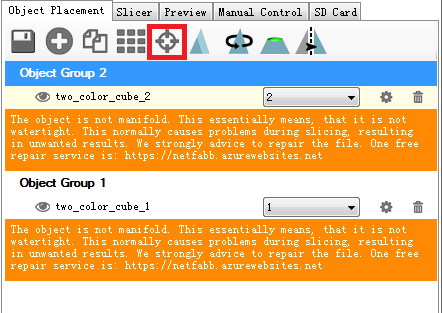
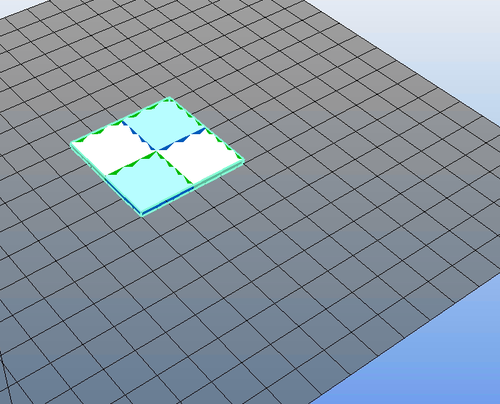
Assign printing task for both extruders respectively.
Step 11: Slice
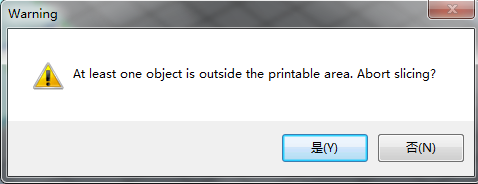
If this warning pops up, choose NO
G-code is generated successfully
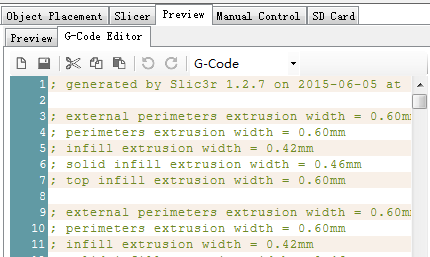
Step 12: you can print directly via serial port (USB connector)or save the G-code to SD card, and print stand-alone.
Step 13′: The end
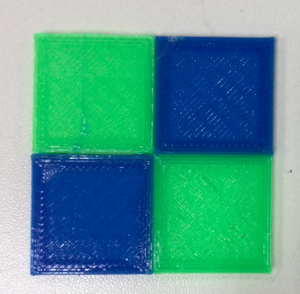
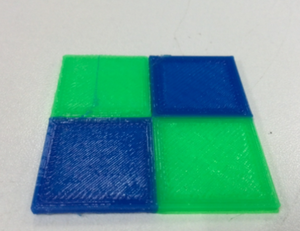
This post is originally published on the Geeetech wiki page and is edited in this blog.
Please be noted this article was last modified on 11 August 2015, and hence is subject to changes, due to software and hardware updates over the years.
If you already have a dual extrusion system, we would like to hear from you. Share you story/experience with us by joinning our forum or Facebook user club. You are also welcome to write on our blog to reach a larger audience.



没有评论:
发表评论