Post-processing is to 3D printing what clothes are to humans. You get the gist, right? 3D prints,more often than not, require various degrees of post-production treatment to be “presentable”.
Whereas 3D printers using the same technology and marketed for about the same price usually do not vary much(theoretically) in terms of print quality, the results of post-processing can vary greatly depending on your expertise and skills. Simply put, you take either 100 percent blame or credit for your finished 3D prints.
So, what processes are involved in post-processing?
•Cleaning
In FDM, cleaning usually means to remove support structures from the object.
As we know, there are two types of support material: soluble and insoluble. Insoluble material is relatively strong and can only be removed with a spatula,knife or sheer brute force,leaving the model and print platform vulnerable from possible damage.
If you are lucky enough to own a dual extrusion setup, you may want to use soluble material for your supports. Soluble materials such as HIPS and PVA, can be dissolved in water or Limonene.
Check out our previous blog on how set up your 2 extruder 3D printer.
•Fixing
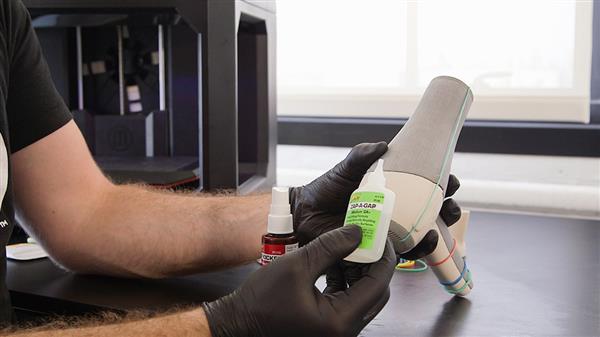
One way to circumvent supports is to have your model printed separately. This means you will have to manually attach together your parts. ABS prints can be welded or glued together using acetone. Here is a tip you should heed: when creating joints or keys for a model, make sure to create joining features large enough for the 3D printer to create them cleanly. Thumb of rule is that features should be larger than 4-5mm in diameter. Glued components should be secured together using rubber bands, and cyanoacrylate glue should be used to spot glue around the connecting areas. If seams are rough or have gaps, bondo or filler can be used to smoothen them.
•Surface finishing
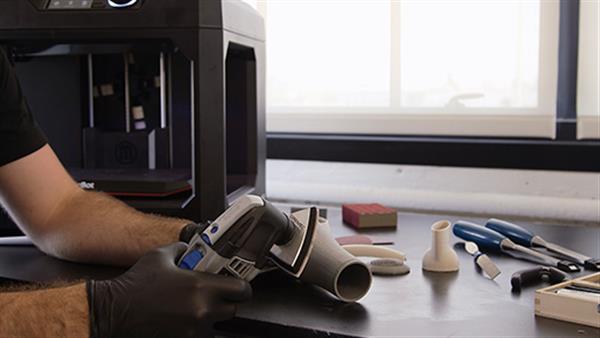
Sanding
Layer lines are the bane of models printed using FDM technology. Carefully sanding the surface of the model with paper should get rid of the lines. This process requires delicate skills and great attention. Start with higher grit to lower as you go. Do not sand in one place for too long as friction-generated heat could melt the material. The downside to manual sanding is inconsistent results, as well as being laborious.
Smoothing
To give the print a glossy finish, chemicals are sometimes used. For example, Acetone and THF are used to smoothen the surfaces of objects printed with PLA and ABS. The problem with this technique is that it can not be controlled: sometimes features are melted off that should remain. On top of that, vapours can be harmful when inhaled.This can be avoided using closed chemical cleaning machines.
•Coloring
Coating and Painting
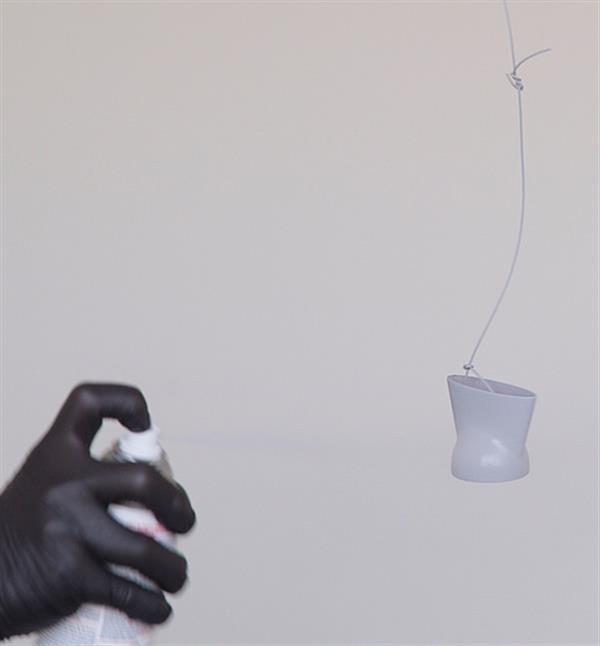
Surface finishing is often followed by painting. Parts need colouring would ideally be printed using white material. A layer of primer is usually applied before the model is painted,followed by another stage of sanding. Painting is usually done manually using a brush or spray(at an arms length). It is highly recommended that you hang the object in an open, dust-free,well ventilated space. This will allow you to paint all surfaces evenly without having to handle the model while paint is drying. The painted object should be ready to polish after 1-2 days.
Credit: beamler, 3der


没有评论:
发表评论