2020年8月28日星期五

3D printing post-processing

 Post-processing is to 3D printing what clothes are to humans. You get the gist, right? 3D prints,more often than not, require various degrees of post-production treatment to be “presentable”.
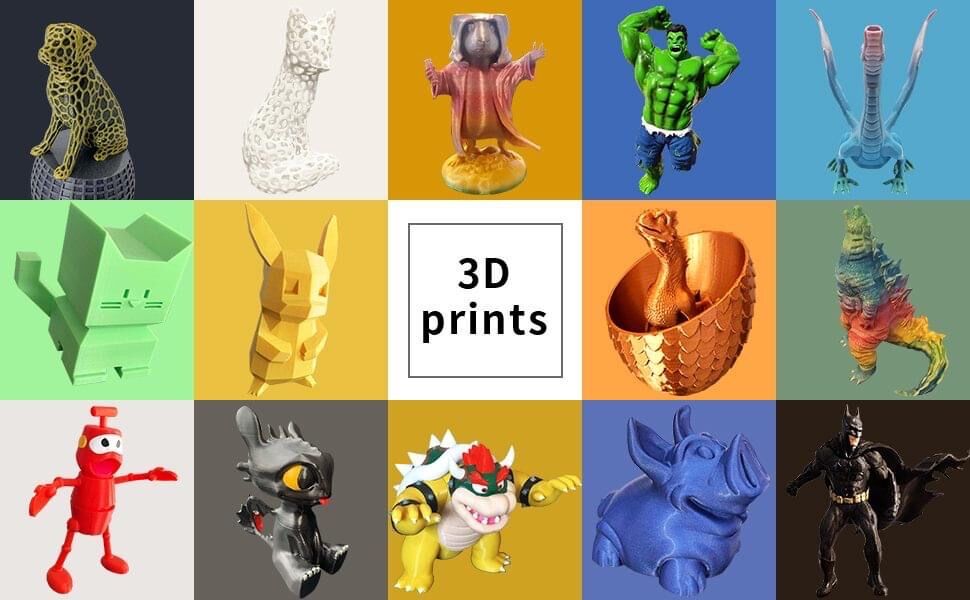
Whereas 3D printers using the same technology and marketed for about the same price usually do not vary much(theoretically) in terms of print quality, the results of post-processing can vary greatly depending on your expertise and skills. Simply put, you take either 100 percent blame or credit for your finished 3D prints.

So, what processes are involved in post-processing?

Cleaning

In FDM, cleaning usually means to remove support structures from the object.

As we know, there are two types of support material: soluble and insoluble. Insoluble material is relatively strong and can only be removed with a spatula,knife or sheer brute force,leaving the model and print platform vulnerable from possible damage.

If you are lucky enough to own a dual extrusion setup, you may want to use soluble material for your supports. Soluble materials such as HIPS and PVA, can be dissolved in water or Limonene.

Check out our previous blog on how set up your 2 extruder 3D printer.

Fixing

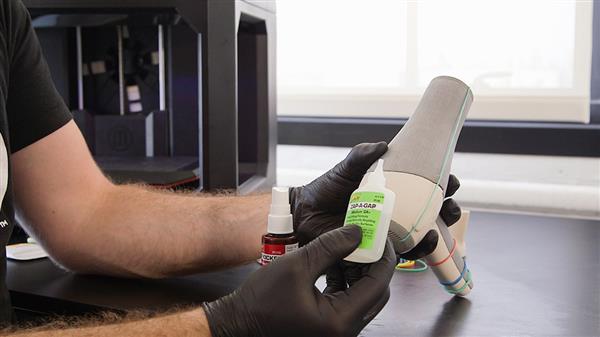
One way to circumvent supports is to have your model printed separately. This means you will have to manually attach together your parts. ABS prints can be welded or glued together using acetone. Here is a tip you should heed: when creating joints or keys for a model, make sure to create joining features large enough for the 3D printer to create them cleanly. Thumb of rule is that features should be larger than 4-5mm in diameter. Glued components should be secured together using rubber bands, and cyanoacrylate glue should be used to spot glue around the connecting areas. If seams are rough or have gaps, bondo or filler can be used to smoothen them.

Surface finishing

Sanding

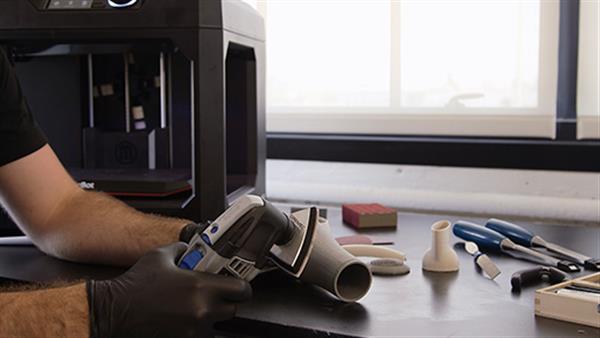
Layer lines are the bane of models printed using FDM technology. Carefully sanding the surface of the model with paper should get rid of the lines. This process requires delicate skills and great attention. Start with higher grit to lower as you go. Do not sand in one place for too long as friction-generated heat could melt the material. The downside to manual sanding is inconsistent results, as well as being laborious.
Smoothing

To give the print a glossy finish, chemicals are sometimes used. For example, Acetone and THF are used to smoothen the surfaces of objects printed with PLA and ABS. The problem with this technique is that it can not be controlled: sometimes features are melted off that should remain. On top of that, vapours can be harmful when inhaled.This can be avoided using closed chemical cleaning machines.

Coloring

Coating and Painting

Surface finishing is often followed by painting. Parts need colouring would ideally be printed using white material. A layer of primer is usually applied before the model is painted,followed by another stage of sanding. Painting is usually done manually using a brush or spray(at an arms length). It is highly recommended that you hang the object in an open, dust-free,well ventilated space. This will allow you to paint all surfaces evenly without having to handle the model while paint is drying. The painted object should be ready to polish after 1-2 days.

Credit: beamler, 3der

2020年8月23日星期日

Soil grows not only fruits and vegetables, but also homes

 The soil in your backyard could be used to build a home, thanks to 3D printing technology.

Researchers from Texas and San Fransisco have come up with a way to turn soil into ink for 3D printing, according to a BBC report. By extracting clay from soil and mixing it with sodium silicate, the researchers created a material that could easily flow through a 3D printer, and harden shortly to form a strong, load-bearing structure.


Although 3D printed buildings are not new, the structures are often made of concrete, which accounts for 7-8 percent of global carbon dioxide emissions,according to some studies. Worse still, its currently not possible to reuse the building material.

The environment impact of the construction industry is an issue of growing concern,’ said Sarbajit Banerjee, principle investigator on the clay-based 3D printing project.

Banerjee added:” Some researchers have turned to additive manufacturing, or building structure layer by layer, which is often done with a 3D printer. That advance has begun to transform this sector in terms of reducing waste, but the materials used in the process need to be sustainable as well.

In search of greener alternatives, scientists at Texas A&M University collected a soil sample in a colleagues backyard. They extracted clay from the sample and mixed it with a non-toxic substance called carboxymethyl (trimethyl) ammonium chloride (CTAC),a by-product of the sugar beet processing industry, which “screensthe microscopic surface layer of the clay. This prevents the clay from absorbing water and expanding.

The scientists also added sodium silicate particles and cellulose fibers, which help the clay stick together so it can be more easily extruded through a 3D printers nozzle.

So far, the researchers have produced small-scale test structures made of processed clay. They want to improve the structuresload-bearing capacity before trying something bigger.

Eventually, the team hopes to develop a toolkitthat can be used to turn any type of soil into a usable ink for 3D-printing. Not only would this eliminate the need for cement, but it would also minimize the energy bills and greenhouse gas emissions associated with transporting heavy building materials long distances to construction sites.

Also of appeal is the opportunity for those in extreme or hostile environments to print large-scale structures, write the researchers in their paper, such as building clinics in times of war or in disease-ridden jungles, or even in extra-terrestrial planetary environments.

The research, led by Professor Sarbajit Banerjee, will be presented this week at an online meeting of the American Chemical Society.

Source: tech.sina.com.cn; sciencefocus

Photo credit: sciencefocus.


2020年8月10日星期一

NASA allows you to 3D print your own mini Perseverance

United Arab Emirates (UAE) ,China, and the United States, all launched their Mars missions at the start of the second half 2020, rekindling the masses’ interest in outer space exploration.

Despite being the last in launching its Mars mission, NASA(the National Aeronautics and Space Administration of the Unite States ) has taken the lead in releasing 3D-printable data for its Mars Rover “Perseverance” and “Ingenuity Mars Helicopter”,allowing 3D printing hobbyists to download the print-ready STL files and print their own Perseverance.. Download the models here.

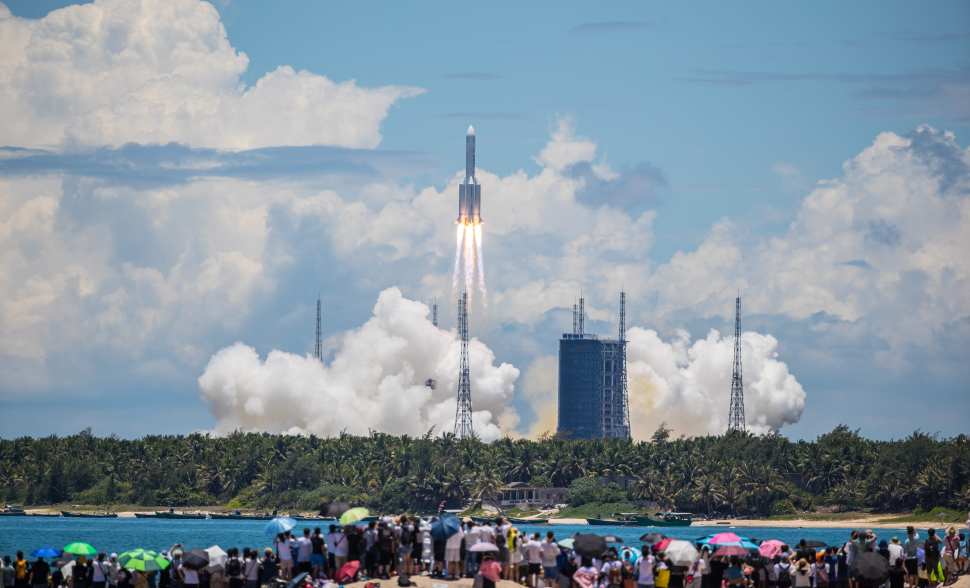
Tianwen-1 Mars probe launched successfully, Wenchang City, Hainan Province, China, July 23, 2020.
photo via oberver.com

After a successful launch on July 30, NASA’s Mars 2020 Perseverance rover is on its way to the Red Planet to look for signs of ancient life and collect rock samples to send back to Earth. Nearly a decade in the making, the 10-foot-long rover is packed with some groundbreaking technologies, instruments and advanced computing capabilities that enables it to land on Mars and survive the cold Martian nights.Unlike its four predecessors, this is the largest and heaviest robotic rover ever built by NASA, and space enthusiasts are enthralled.

Pre-launch events were packed to capacity, with people of all ages from around the world participating in behind-the-scenes observations of the rover, immersive augmented reality virtual tours, 3D visualization of the mission’s scientific instruments, and even the chance to 3D-print a full-size replica of Perseverance.

Make your own mini, simplified “Perseverance”

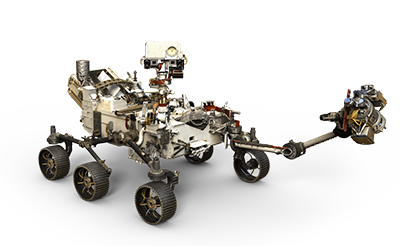
Engineers at NASA’s Jet Propulsion Laboratory (JPL) who built the probe have released the STL files and assembly instruction. This is the 110th 3D-printable model NASA has made available to the public.It includes everything from Saturn rockets and ISS tools to Orion capsules and even landing sites for many Apollo missions.To make a mini Perseverance, users need to 3D print 39 parts, many of which require multiple prints, and then have them assembled. All the sub-components are available, including the mobile and manipulator arm, chassis, wheels and radioisotope thermoelectric generator (RTG). 

photo credit: NASA

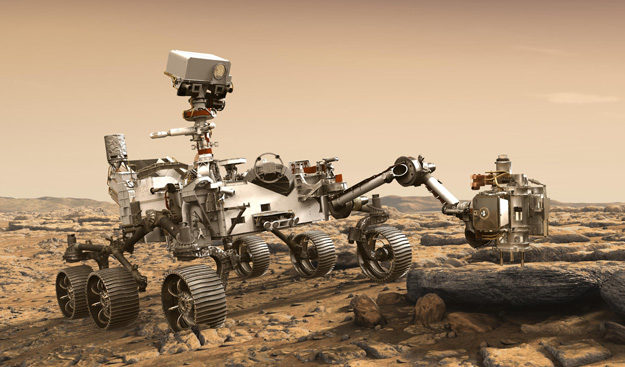
Nearly a decade in the making, the Mars 2020 mission vehicle weighs more than a ton and carries seven scientific payloads, a robotic arm, the Ingenuity Mars Helicopter, 25 cameras and the first microphone to record sound on the Red Planet.

Some of the main parts in the car-sized Mars rovers, such as the cruise stage, descent stage, rear shell and heat shield, were built on the success of NASA’s Curiosity Rover– part of the Mars Science Laboratory mission.

The nuclear-powered Mars rover is NASA’s ninth mission to Mars and the first since the 1970s’ Viking program aiming to find evidence of life on Mars. Before landing in Jezero Crater, a massive basin north of the equator on Mars, the spacecraft will travel 290 million miles over a cold, dark and relentless seven-month journey on a United Launch Alliance (ULA V) rocket launched from Cape Canaveral Air Force Base in Florida.

photo via astrobiology.com

2020 turns out to a very busy year in space, with dozens of missions to orbit the moon and Mars.In addition to the United States, there are two other interplanetary missions to Mars: the United Arab Emirates’ Hope, launched on July 14, will study the Planet’s atmosphere and climate; and the recent launch of China’s first ever fully homegrown spacecraft, Tianwen 1. Currently, all missions are on their way and are expected to arrive in February 2021.

The Perseverance’s astrobiology mission is to look for signs of past microbial life on Mars, explore the diverse geology of its landing site, and demonstrate key technologies that will help future robotic and human exploration.While most of Perseverance’s seven instruments are designed to learn more about the planet’s geology and astrobiology,the MOXIE(Mars Oxygen In-Situ Resource Utilization Experiment) instrument is focused on upcoming missions, according to NASA.Designed to prove that it’s possible to convert Martian carbon dioxide into oxygen, it could lead to future versions of MOXIE technology that could become staples in Mars missions, supplying oxygen to rocket fuel and breathable air.

Deep space exploration is still one of the most alluring undertakings.Missions like The Perseverance and others before it have intrigued millions of people.Today, with the help of 3D printing, you can recreate these probes at home. It has proven to be a great tool for engaging students and educators in space-related activities, aiding them in understanding remote terrains, spacecraft engineering and etc.

Source:ofweek.com; astrobiology.com; NASA

This post is originally published on geeetech official site

2020年8月6日星期四

Making history: human tissue 3D printed in space

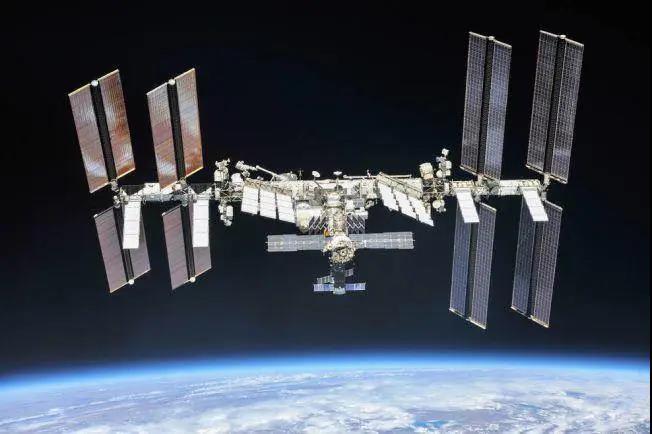
Russian astronauts have successfully 3D printed human tissue in space.

With the advances in science and technology, new ideas are being materialized all the time,from 3D printed cartoon characters to 3D printed organs. From earth to outer space,3D printing is certain to usher in an era of “space manufacturing” and a new round of medical innovation.

3D printing plays a key role in regenerative medicine,which is getting a lot of attention.

In fact, dating back to 1987, the concept of “regenerative medicine” was proposed and received worldwide attention.It was so popular that by the first half of 2019, 933 companies were registered in regenerative medicine globally.And regenerative medicine related technology and industries have since been booming due to the huge demand.

Compared to conventional manufacturing processes,additive manufacturing boasts high repeatibility and efficiency, and is capable of creating complex tissues and organs containing a variety of cells, growth factors and biological materials,a huge boost to regenerative medicine.

geeetech 3d printer

In April 2019, researchers at Tel Aviv University successfully 3D printed the world’s first vascularized heart,the size of 2.5cm,using the patient’s own cells and biomaterials.This was a key step towards the adoption of 3D printing technology by bioscience in producing functional human organs, causing a sensation in the medical field and beyond.


But this is the first time to have human tissue successfully printed in space.


Human beings have always been fascinated by outer space. Yet, we are intimidated by its harsh environment–In micro-gravity,our bodies are subject to all sorts of conditions, such as muscle atrophy, bone loss and etc.


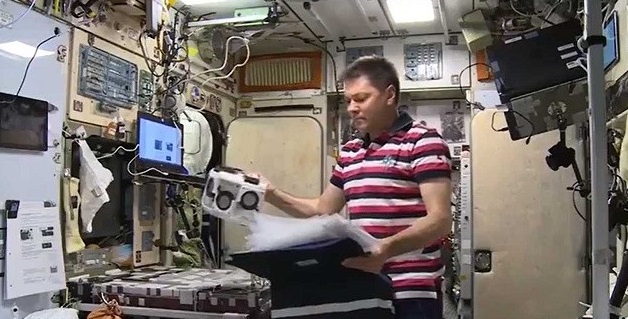
Recently, a Russian astronaut on the International Space Station has created human cartilage in micro-gravity with the help of 3D printing.

Traditional methods of human tissue regeneration involve seeding cells onto bio-compatible “scaffolds”. Once the tissue has finished self-assembling the organ, the scaffold material will be biodegraded. 3D printing organs on Earth is one thing;replicating the same processes in outer space is quite another.There is little gravity on the International Space Station for the scaffold to hold the cartilage cells together.

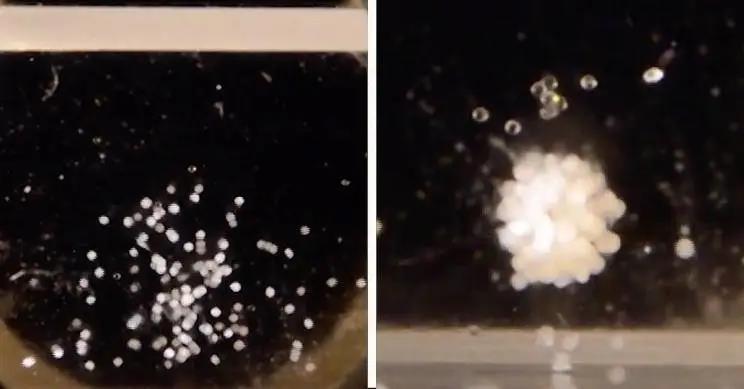
To get around the problem,Oleg Kononenko used a “scaffold-free” tissue-engineering device,developed by Moscow-based 3D Bioprinting Solutions,in the customized assembly machine.The method leverages a magnetic field instead of gravity to direct cells to where they need to go, thus assembling them into more complex structures.

This has positive implications for astronauts being able to stay in space longer, or for people who want to realize their dreams of space travel.

Utkan Demirci of Stanford University School of Medicine is the driving force behind the maglev biological assembly method, which aims to build tissue in microgravity. The technique leverages two relative magnets close to each other to create a force that pushes the cells toward each other. “Electromagnetic or magnetic fields are controlled, so we can move cells to where we want them to go in order to assemble them into more complex tissue structures.”says Demirci.
In addition,more practice and experimenting are expected here on Earth. Demirci believes that such research in space could lead to interesting discoveries in cancer biology and cross-infection, such as HIV or COVID-19.

But the study also faces a challenge: cells need to be suspended in a paramagnetic medium containing gadolinium (Gd) ions at concentrations that could be toxic to the cells and cause pressure imbalances. And one of the potential solutions to these problems is to use suspension assembly in microgravity, that’s why we finally got to witness the latest experiment conducted by Russian cosmonauts on the International Space Station.

The experiment’s success boosts space regenerative medicine, which, if developed further, may one day help crew members replace body parts. Then astronauts can finally “live on their own hump”!

Source: qq.com

https://www.geeetech.com/blog/2020/08/making-history-human-tissue-3d-printed-in-space/

This post is originally published on geeetech official blog.

2020年8月5日星期三

Step-by-step guide to dual extrusion setups

Nowadays, desktop 3D printers that come with 2 extruders are more powerful and affordable. Still, many, especially beginners are intimidated by those dual extrusion systems. In light of this, i am presenting to you this step-by-step guide to dual extruder 3D printers in the hopes that you will be able to operate one yourself in the end.


Before reading this article,please make sure you have already read the set up guide of the version of 13B single extruder and you are able use it to print 3D models. If not, please learn how to operate the single extruder. Of course, you can take this one as the single extruder version to get started.

Step 1

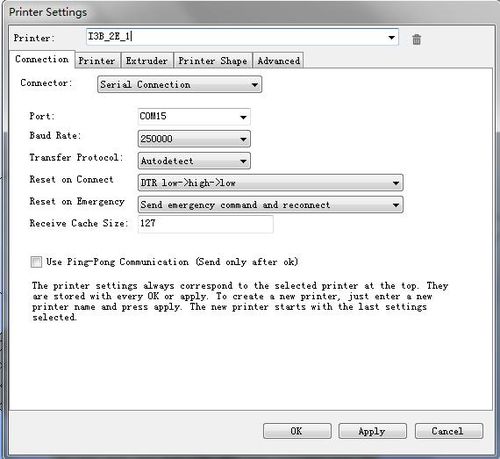
Open Repetier Host,click Config/Printer Settings to set up the connection.

1. Name your printer.

2. Select the corresponding COM port and baud rate. Baud rate is generally 115200 or250000.

3. If you are not sure about the COM port, you can check it in your device menager.

Printing setting1.jpg

Step 2

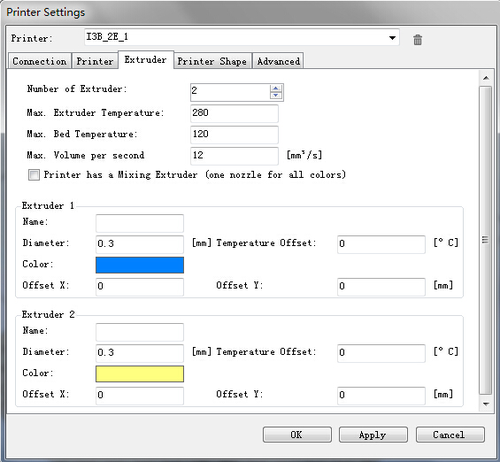
Set up your extruder

1.Choose the number of extruder, here we choose 2.

2.Select the diameter and color of filament

3.Offset X/Y refers to the distance between the two extruders,which can be adjusted based on real situations. You can leave it alone now.

Printing setting2.png

Step 3

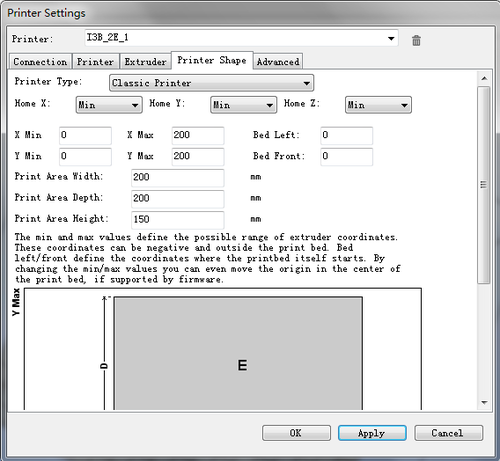
Set up the shape of printer

Choose Classic printer as the printer type.

Home X: min Home Y: min Home Z: min

Print height: 150

Printer setting3.png

Now,you can click the Connection button on the left corner to check whether it can connect with your printer. If it fails, please recheck the COM port and Baud rate.

Step 4

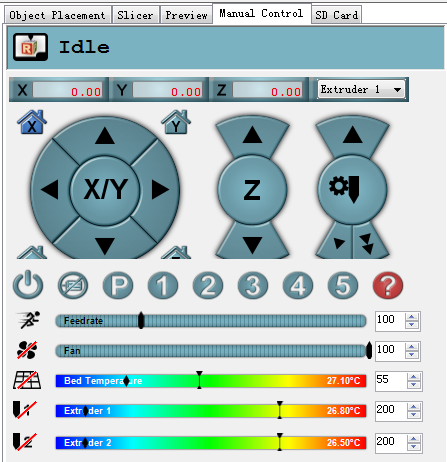
Manual control

Printer setting4.png

1. X home

Click X home to home the X axis, or you can click the right/left arrow to move the axis to check whether the direction and distance is correct or not;

2. Check Y axis and Z axis respectively in the same way

3. Click the icon of heated bed on RH to heat up the bed. observe whether the temperature is rising to a pre-set value

4. Click the icon of heated bed and extruder, observe whether it is heating up to the pre-set temperature and keeps at that value

5. When the temperature for the extruder surpasses 170 °C , choose extruder1 and extruder2 respectively, you can move them and check their directions

Step 5

Leveling the two extruders.

Leveling the two extruder is very important if you want to print with two extruders at the same time.

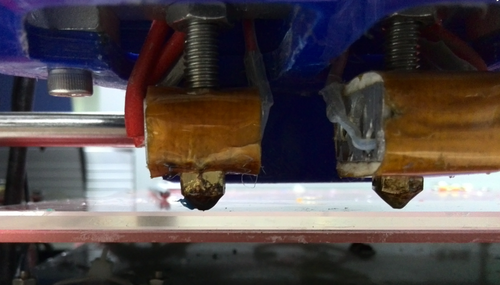
First, you can adjust one extruder to make it parallel with the surface of the heated bed (the same way you level for a single extruder setup) , click the button of Z home to adjust the distance between the nozzle and the heated bed, make sure the vertical distances of the nozzle to the four corners of the bed are the same.

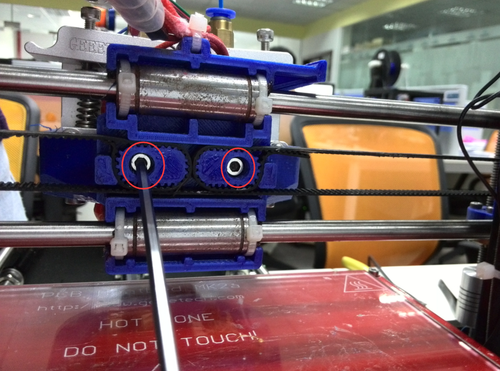
After that, tweak the distance between the second extruder and the heated bed by adjusting the screws, as shown in the following picture: Loose the screws, and then you can move on to get the right distance between two extruders and heated bed.

Printer setting5.png
Printer setting6.png

you may need to repeat this step to get it all right.

But it’s worth it. Once you get it done correctly, you wouldn’t need to do it again.

The settings mentioned above are on Repetier Host,which only involves the control of 3D printer and the preview of model.

All the settings do not concern the print result but slicing. So we will continue with the slicing setting. The slicer is independent of Repetier Host. So,should we set up the slicer now? Take it easy. Let’s see whether our printer can run normally.

Step 6

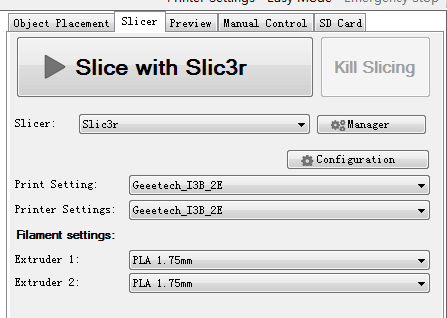
If the printer goes well. We can go on with the slicing. First let’s get a quick view of the slicer.

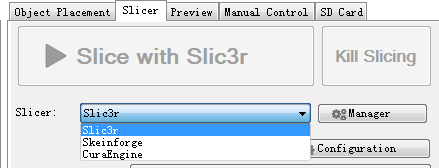
RepetierHost supports many slicers, with Slic3r and CuraEngine being the most popular; Slic3r is more powerful in terms of functionality, but CuraEngine comes with more optimized slice velocity.

Printer setting7.png

You can choose slicer here. Upon selecting the slicer, please click Configuration.RepetierHost will bring up a wizard of the corresponding slicer that will walk you through the configuration.

Here we take Slic3r as a demonstration. As to the configuration in CuraEngine,we will pick it up in the follow-up study in our forum www.geeetech.com/forum/, so, please stay tuned. If you are experienced in CuraEngine, we would appreciate it if you cou.ld share your insights with us.

Next, download the file:two_color_cube.zip, unzip the file and save it somewhere.You will need it later.


Step 7

Click Configuration,open Slic3r

Printer setting8.png

Step 8

We have prepared a set of parameters for I3B_2E dual extruder, that is, I3B_2E_config_bundle.ini. You will need import those parameters to slic3r from here.

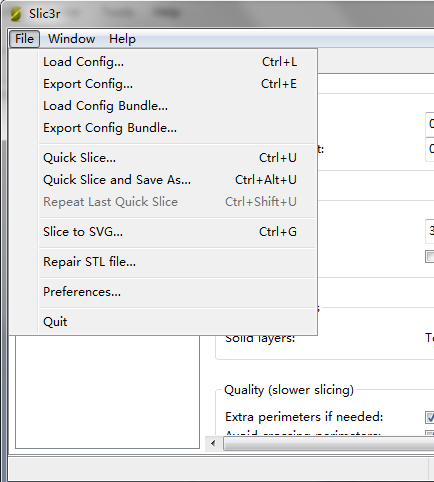
In Slic3r, under file> Load Config Bundle.. navigate to the folder we just downloaded and unziped, open I3B_2E_config_bundle.ini,

Printing setting9.png
Printing setting10.png
Printing setting11.png

Step 9

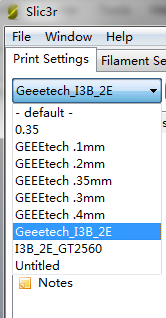
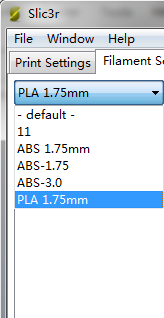
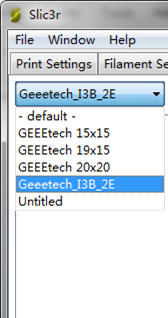
After loading, you can find the option of Geeetech_I3B_2E in the drop-down menu.

Printing setting12.png
Printing setting13.png
Printing setting14.png

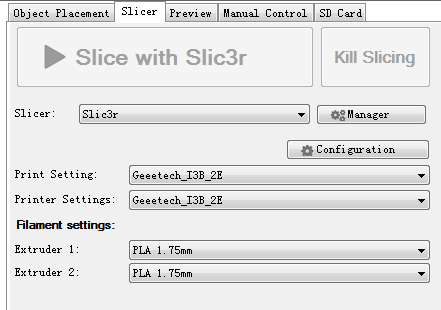
In my case, i use the geeetech pro C model,(i refer the I3B_2E in this article),extruder is MK8(1.75cm-0.4mm),PLA filament, so we choose Geee_I3B_2E, PLA 1.75mm, and Geeetech_I3B_2E respectively .

All the parameters you set can be saved in RepetierHost for future reference.

Printing setting15.png

Step 10

Unzip two_color_cube.zip,click Load to import the .stl files,choose two_color_cube_1.stl and two_color_cube_2.stl respectively.

Printing setting16.png

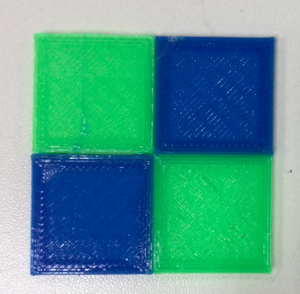
Actually, two_color_cube is composed of two .stl files. each printed by one nozzle.

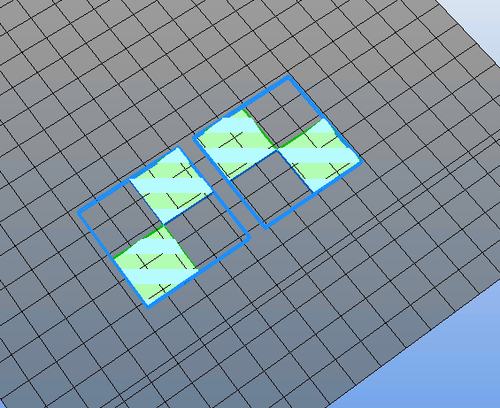
After loading, you can preview it. The two files are separated.Now you need to adjust the locations to combine them together.

Printing setting17.png

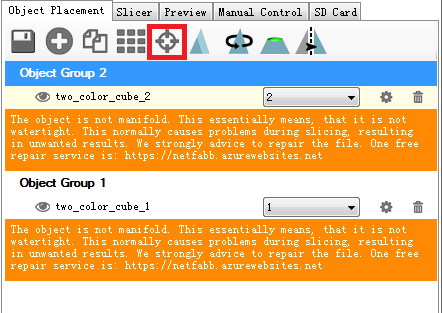
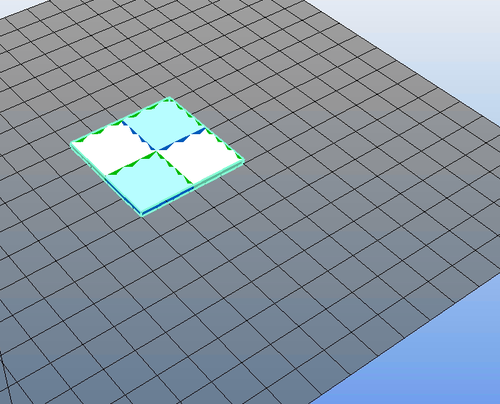
Select Object Group 2 and click center, then Object Group 1 and center. Now the two models are combined as one.

Printer setting18.png
Printing setting19.png

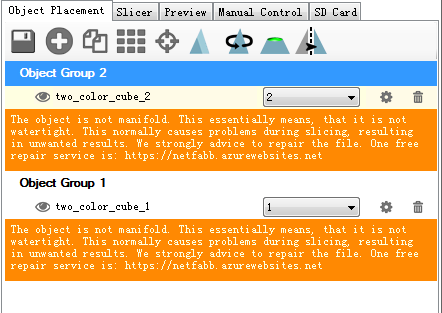
Assign printing task for both extruders respectively.

Printing setting18.png

Step 11: Slice

Printing setting21.png
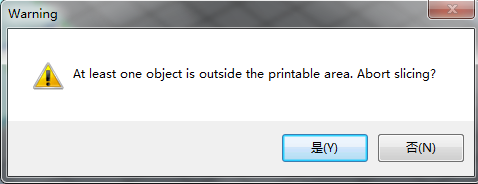
If this warning pops up, choose NO
Printing setting22.png

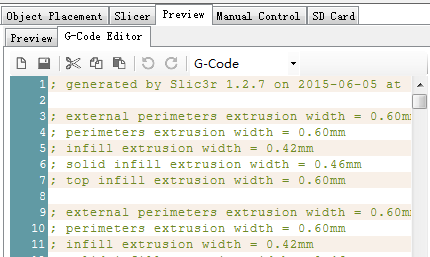
G-code is generated successfully

Printing setting23.png

Step 12: you can print directly via serial port (USB connector)or save the G-code to SD card, and print stand-alone.

Step 13′: The end

Printing setting24.png
Printing setting25.png

This post is originally published on the Geeetech wiki page and is edited in this blog.

Please be noted this article was last modified on 11 August 2015, and hence is subject to changes, due to software and hardware updates over the years.

If you already have a dual extrusion system, we would like to hear from you. Share you story/experience with us by joinning our forum or Facebook user club. You are also welcome to write on our blog to reach a larger audience.

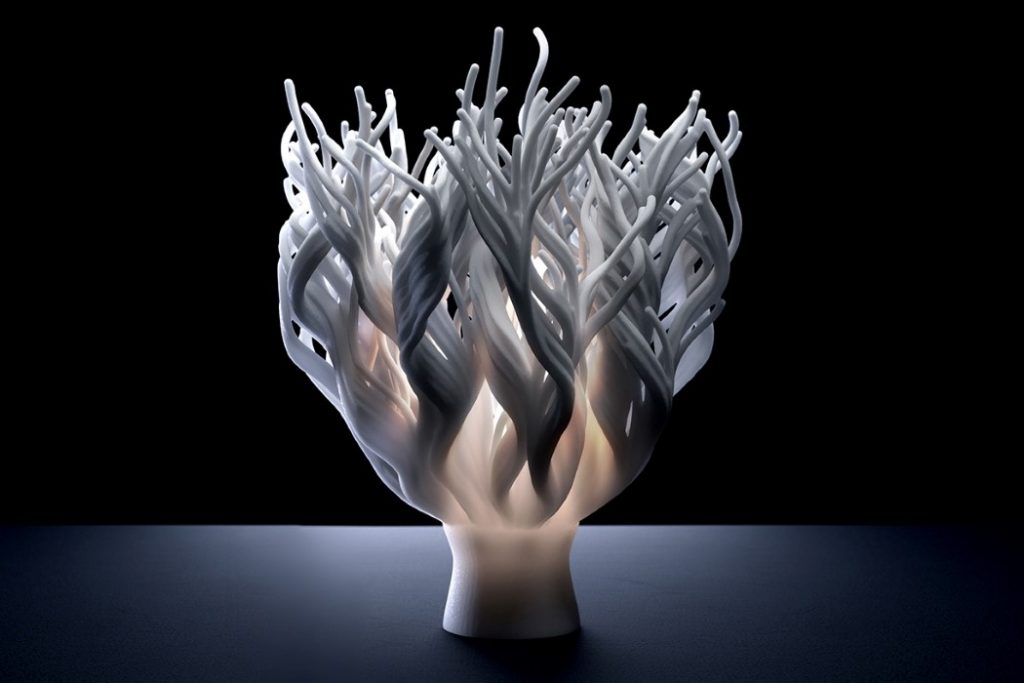
Watch These Bionic 3D -Printed Coral Lamps

  It’s one thing to create attractive and functional light fixture, and quite another thing to make a stunning light using algorithms that c...